Low Light Photography Skills for Wedding Photographers
Wedding photography requires a wide variety of photography skills from candids to portraits and more. Additionally, wedding photographers shoot all day and all night in a variety of lighting conditions. One of the most challenging aspects of the day is dealing with low light photography conditions.
In this article, we’ll talk about the best camera settings for low light photography. Then, we’ll discuss the best camera gear for low light. And finally, we’ll talk through some tips and techniques you can use to achieve well-exposed photos regardless of the lighting conditions.
Hopefully understanding these concepts will help you feel more confident as the light starts to fade. Have no fear, it is possible to create sharp and interesting photos in low light. Just like everything it takes a little practice and exposure (pun intended) to a variety of conditions. After reading this article you’ll be ready to tackle wedding photography low light.
Breaking Down The Best Camera Settings For Low Light Photography
The first thing you’ll want to understand before heading into low light conditions at a wedding or other event is how your camera sees light. In this section, we’ll talk about the best camera settings for low light photography. Getting the settings right will help you obtain sharp and well-exposed images.
A better understanding of the camera settings required for low light photography will also help you choose the right gear and techniques to learn. We’ll start by talking through the exposure triangle and how to balance aperture, ISO, and shutter speed in order to deal with the conditions you have.
Check out this post on camera settings for weddings if you need an in depth review of how settings impact other aspects of the wedding day.
Setting the Widest Aperture (F-stop)
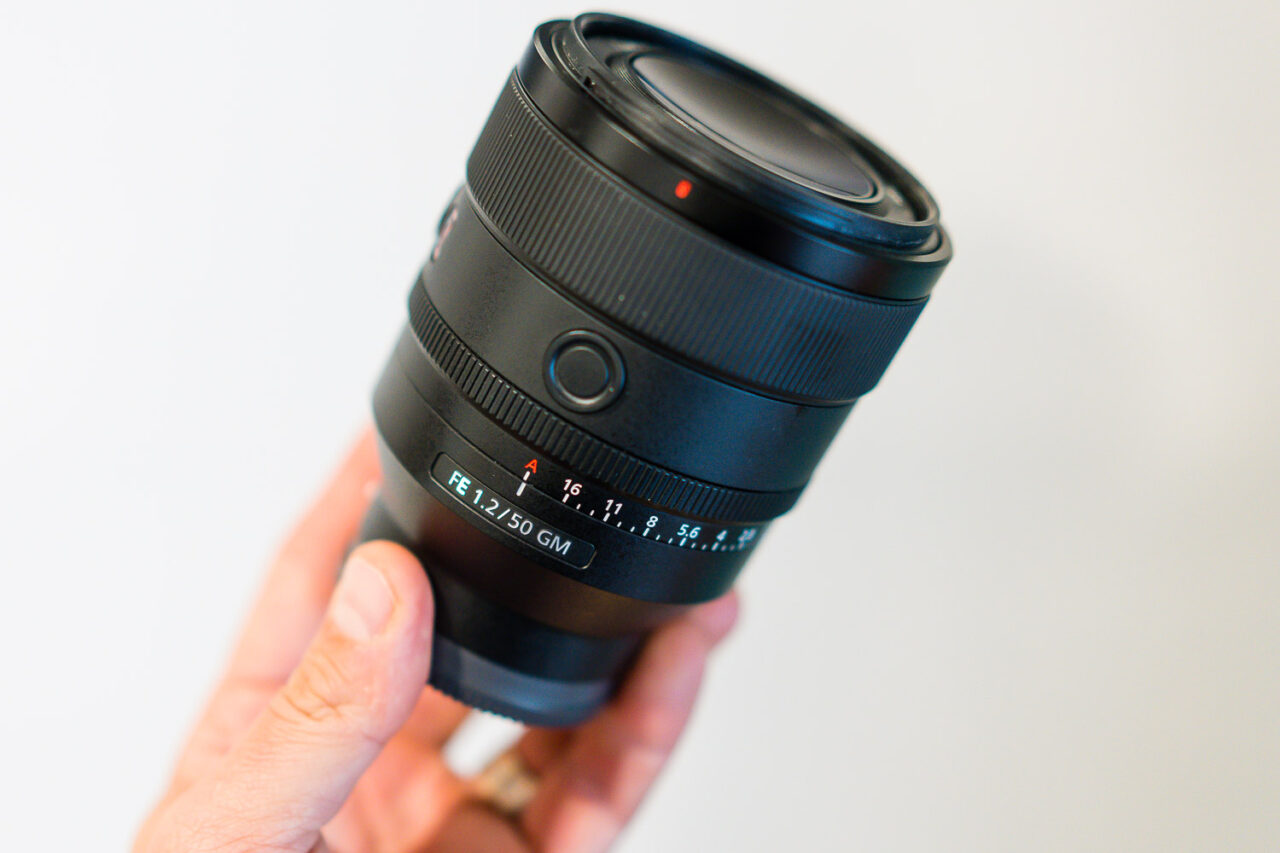
In low light conditions, using a camera lens with a wide aperture (low f-number) is essential to let more light into the camera. This will also create a shallow depth of field, which can add a beautiful bokeh effect to your photos. Aim for an aperture of around f/2.8 or wider, depending on your lens.
In low light conditions you’re aperture decision is often made for you and you’ll want to use a wide maximum aperture or the fasted aperture available to you. The main consequence of a low aperture is a shallow depth of field which is often a pleasant effect as long as you get accurate sharpness. The wider aperture you use the less you’ll have to push your ISO or lower your shutter speed which has other consequences.
To let in as much light as possible, many photographers use lenses in the f/1.4 or f/1.8 range. You’ll find that these are almost exclusively prime lenses. Though they can be expensive, you can find cheaper alternatives from off brand manufacturers like Samyang (the cheapest) or Sigma (good quality).
When to Push Your ISO Higher
In low-light situations, you may need to increase your camera’s ISO to get a brighter image. However, higher ISOs can result in more digital noise or grain in your photos. Try to find a balance between a bright enough exposure and an acceptable level of noise.
Most modern cameras can handle ISOs of 1600-3200 without too much noise. In the next section, we’ll talk about choosing the right camera gear to handle your expectations.
Choosing the Best Shutter Speed
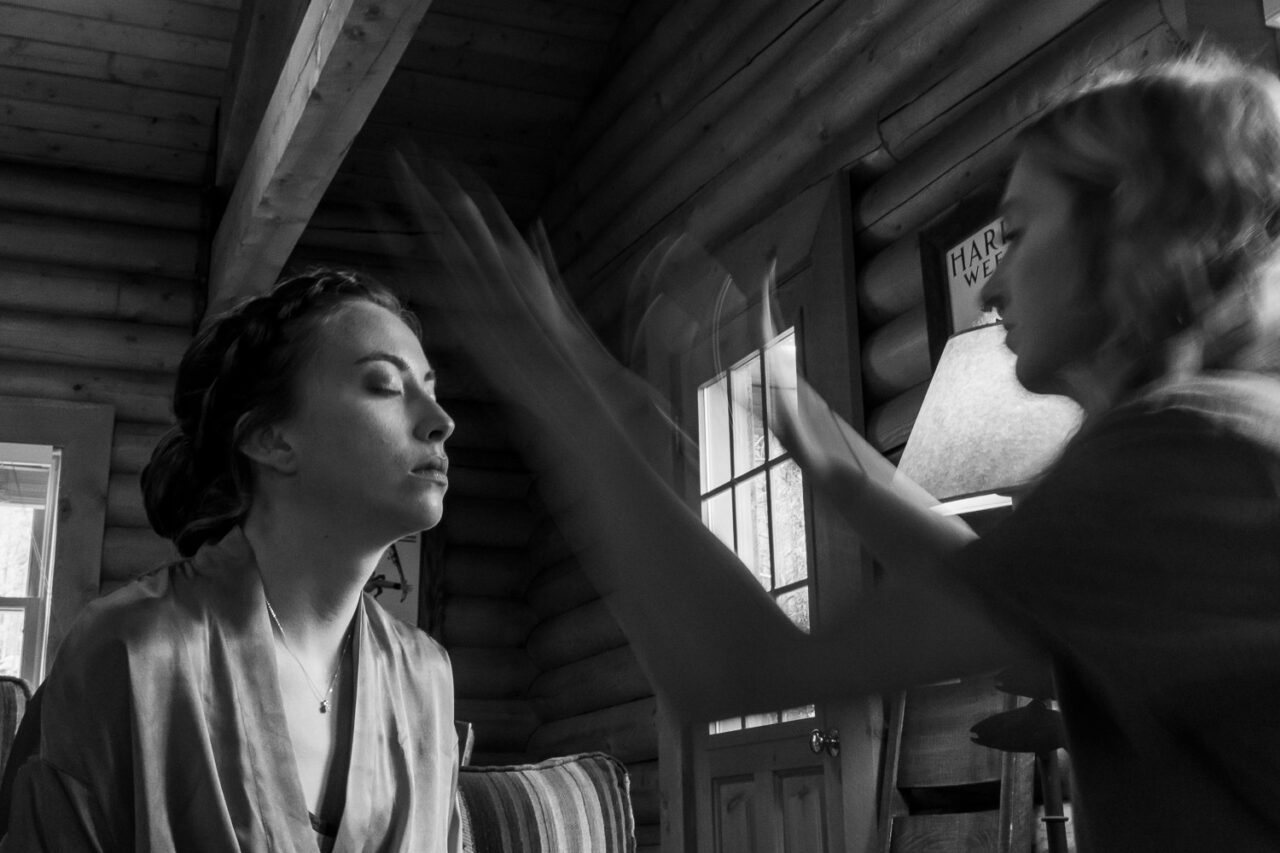
In low light, using a slower shutter speed can help you capture more light, but it also increases the risk of camera shake and motion blur. To avoid this, you can consider using a tripod or other stabilizing device to keep your camera steady. If you’re hand-holding the camera, try to use a shutter speed that’s at least as fast as the focal length of your lens (e.g. 1/50 sec for a 50mm lens).
Keeping your shutter speed high enough is one of the hardest parts of shooting in low light. Having a camera with in body image stabilization is great but that only helps with camera movement. Regardless of how stable the camera is, if your shutter speed is too low for the movement of your subjects, you’ll have blurry images.
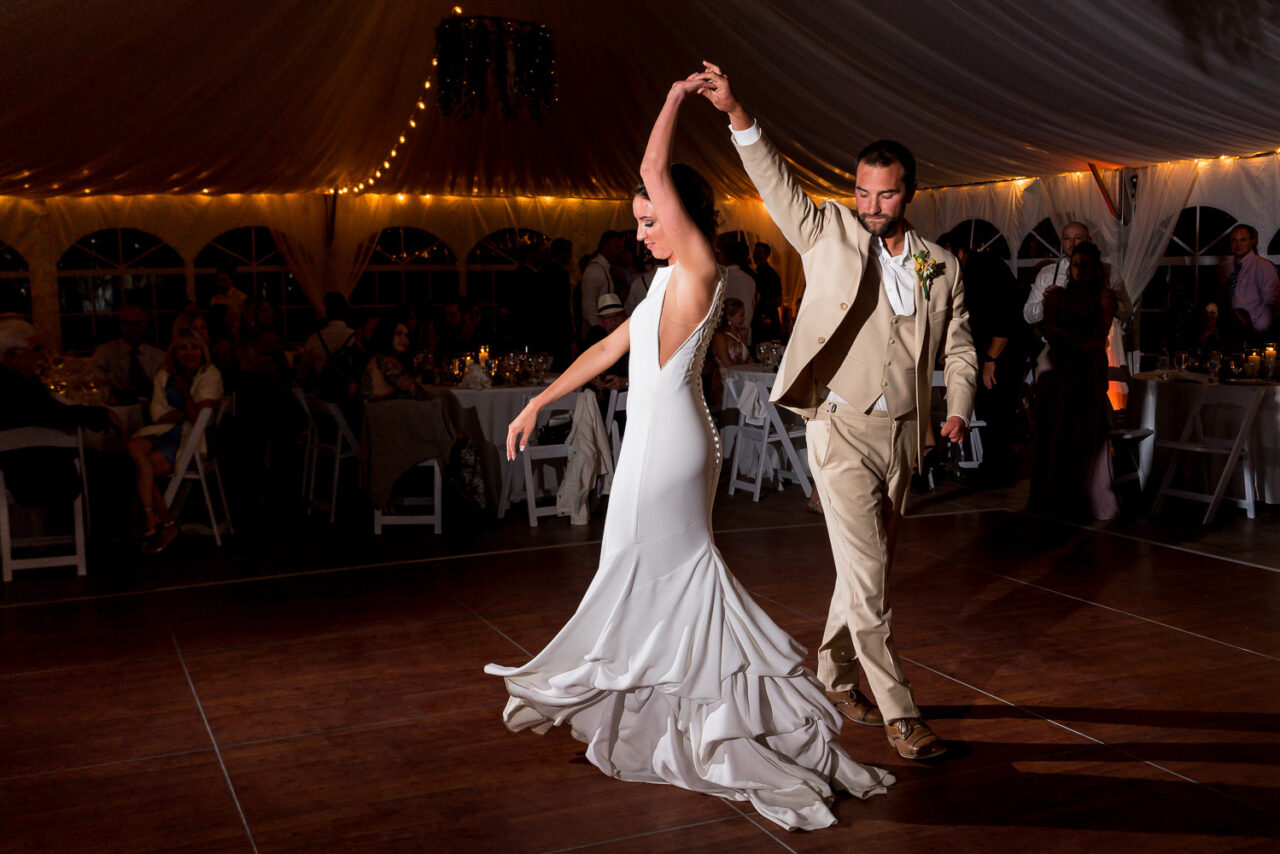
In most cases, having a shutter speed of at least 1/200 is a good starting point. This minimum shutter speed will freeze people as long as they’re not moving quickly. If you expect fast movement (dancing, running, etc) a faster shutter speed (1/500 to 1/1000) will be required. You’ll need a higher iso setting or a wider aperture to let in more light.
If you are incorporating flash into your photography you can use the flash to freeze the motion which is an effective way to shoot at slower shutter speeds. You might even embrace some aspects of motion blur to make more interesting compositions.
Shoot in Raw
Shooting in RAW format allows you to capture more information in the image and gives you more flexibility in post-processing. This is especially important when shooting in low light, as it can help you recover detail in the shadows and adjust the exposure without losing image quality much. Even if avoided motion blur and slower shutter speeds, your image may still be a little dark. During the edit, you’ll be able to bring back 1-2 stops of light by increasing exposure.
So if the question is between camera shake and blurry images, choose higher shutter speeds and make sure you have sharp photos. Then just increase the exposure in the edit. Of course, this is not an option if you have an old camera or are shooting at very high iso settings because the file will start to look grainy and washed out.
Focus Mode
In low light, autofocus can struggle to find focus points depending on your camera. You can switch to manual focus to have more control over what you want to be in focus. Use the magnifying feature in your camera to zoom in and check the focus before taking the shot.
Another option with manual focus is to utilize the hyperfocal distance of your wide angle lenses. This allows you to prefocus manually and know the distances at which your images will be sharp. For example, if you pre-focus at 9 ft, your 16mm lens at f/2.8 will be sharp from about 4ft all the way to infinity. You can experiment with this and use a depth of field calculator to get familiar.
Lastly, using a newer camera body, a fast lens (f/2.8 or faster), and a wide focus area will allow you to more accurately lock focus. Get to know your camera in low light and it will perform better for you. Low light conditions are a challenge so I strongly recommend lots of testing & practice.
The Right Camera Gear for Low Light Conditions
When shooting in low light conditions, having the right camera gear can make a significant difference in the quality of your photos. Fast lenses with wide apertures, full-frame cameras, image stabilization, high ISO capabilities, and a flash are all important pieces of equipment to consider for low light photography. Remember, the key is to find a balance between the camera settings that we discussed in the above section and the equipment you have.
If you want to dive deeper into wedding photography gear, here’s a gear checklist you can start with.
Faster Lenses
You’ll want a fast lens with a wide aperture, such as f/1.4 or f/1.8. The wider the aperture the faster shutter speed you’re able to use. That’s why wide-aperture lenses are often referred to as fast lenses.
As we talked about above, wide apertures will let in more light which will keep you from needing to push your ISO or shutter speed too far. You might have a variety of lenses that you like using throughout the day but in low light conditions, you’ll want to use your lenses that have the widest, maximum aperture, and, low f-number capabilities.
Some of our favorite lenses are listed below. They are not the fastest lenses available but they are great in low light situations and we have had great luck:
Full Frame Cameras
A full-frame camera has a larger sensor than a crop-sensor camera, allowing it to capture more light and produce less noise in low light conditions. Full-frame cameras also tend to have better low-light performance than crop-sensor cameras, making them an ideal choice for low light photography. Our current favorite for low light photography is:
Sony A7SIII – One of the best cameras on the market for low light photography
Sony A7IV – A close second to the A7SIII and a great low light photography camera
Image Stabilization
As I mentioned briefly above, Image stabilization can help compensate for camera shake when shooting handheld in low light conditions. Many cameras and lenses have built-in image stabilization, but it’s important to check the specifications before purchasing. Almost all the Sony mirrorless cameras have in body image stabilization (IBIS).
IBIS is key for combatting blurry photos because the photographer wasn’t steady but isn’t the only solution to sharp photos. You still have to have slow moving subjects if you want to shoot at a slow shutter speed.
ISO Capabilities
ISO measures the sensitivity of the camera’s sensor to light. A camera with a high ISO capability allows you to shoot in low light conditions without needing to use a slow shutter speed or wide aperture, which can lead to blurry photos. Look for a camera that can handle high ISOs without producing too much noise. As I mentioned above, one of the best cameras on the market for low light photography is the:
Flash
A flash can be used to add additional light to a scene when shooting in very low light conditions. However, it’s important to use it correctly to avoid overexposing or creating harsh shadows. Consider using an external flash that can be tilted and rotated for more control over the direction of light. This allows you to bounce the light off a nearby wall or ceiling to make it more dispersed and effective.
The main suggestion I encourage is to get your flash off the camera. The easiest way is to look at a wireless system like the one from Godox:
Godox X Pro S II Trigger – a compact wireless trigger that will control your Godox Lights
Godox V860III – On camera flash that also works as a trigger to control other Godox Lights
Godox AD200 – this is a more powerful flash (2-3x that of a typical speedlite flash)
In addition to a trigger and a flash, you’ll also need a light stand of some kind. We typically use to different styles:
Travel Stands – great for throwing on your backpack and using a variety of situations or on trips. We often hold these for each other since they are not very tall and getting a higher angle on the subject is helpful.
Full Size Stands – great for setting up in a room where they won’t move much. We often use four these to light the dance floor (don’t put it somewhere that it will get kicked).
The most important thing is to control the direction of the light so that it hits your subject in a flattering way and doesn’t spill all over the backdrop. One thing that is super helpful for this is a grid. Our favorite:
Magmod Grid
Control What You Can
Once you understand the camera settings and have the best gear for shooting low light photography that your budget will allow, it’s time to get creative. Below are some low light photography tips that might help you have better compositions, exposure, or more interesting photographs. We’ll talk about things like how to use available light, add light and play with long exposures.
Position Subject Closer to the Light Source
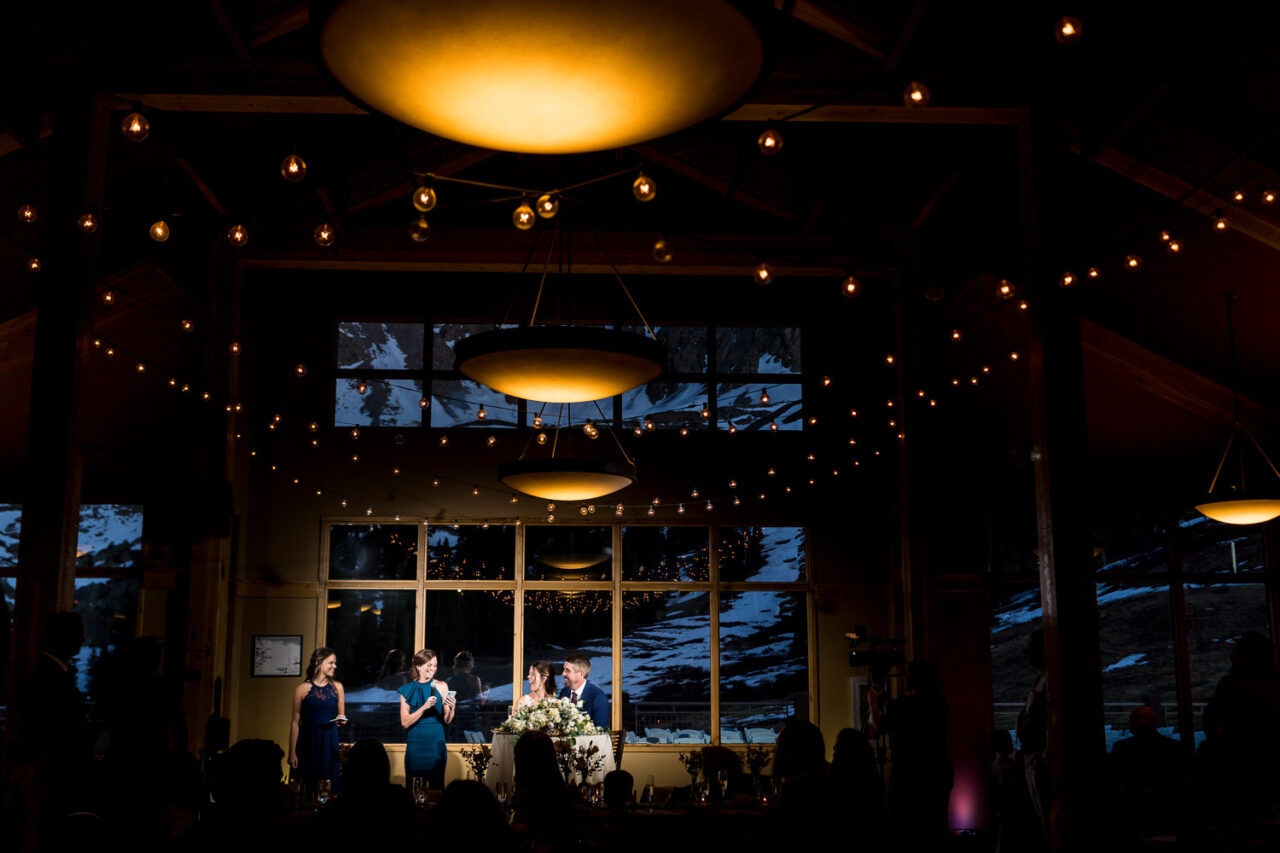
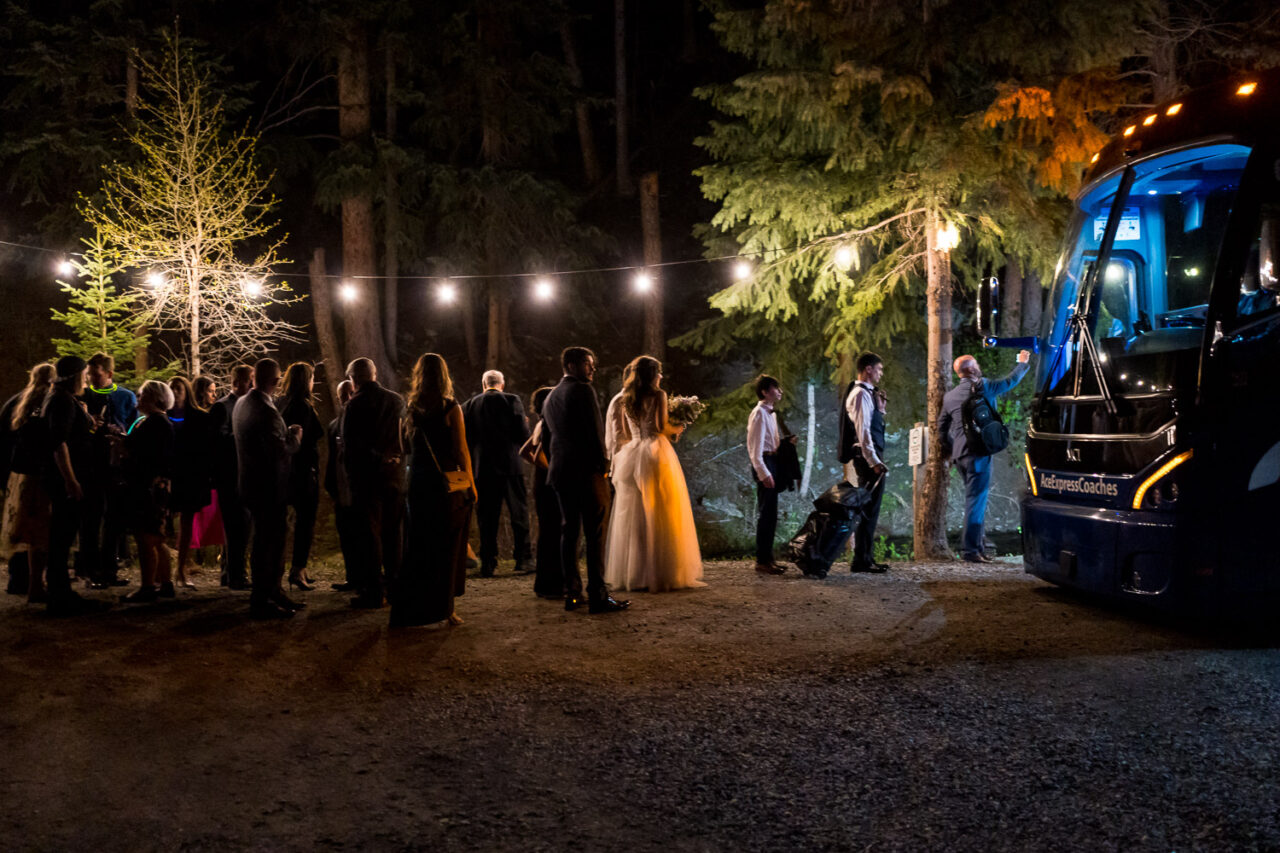
When shooting in low light, it’s important to make the most of any available light. This could be natural light from windows or doors, or artificial light from candles, chandeliers, or lamps. Sometimes you have control over your subject and can place them in the available light.
If you’re capturing candids and can’t move your subject, you can still move yourself in order to get the best angle on your candid subject. Look for beams of light and stories they might tell. Wait for moments when your subject passes near interesting ambient light.
One of the most challenging and rewarding things is to find a good pocket of light, then wait for a subject to pass through it. This can be a challenging game to play but can yield some incredible results if you stick with it.
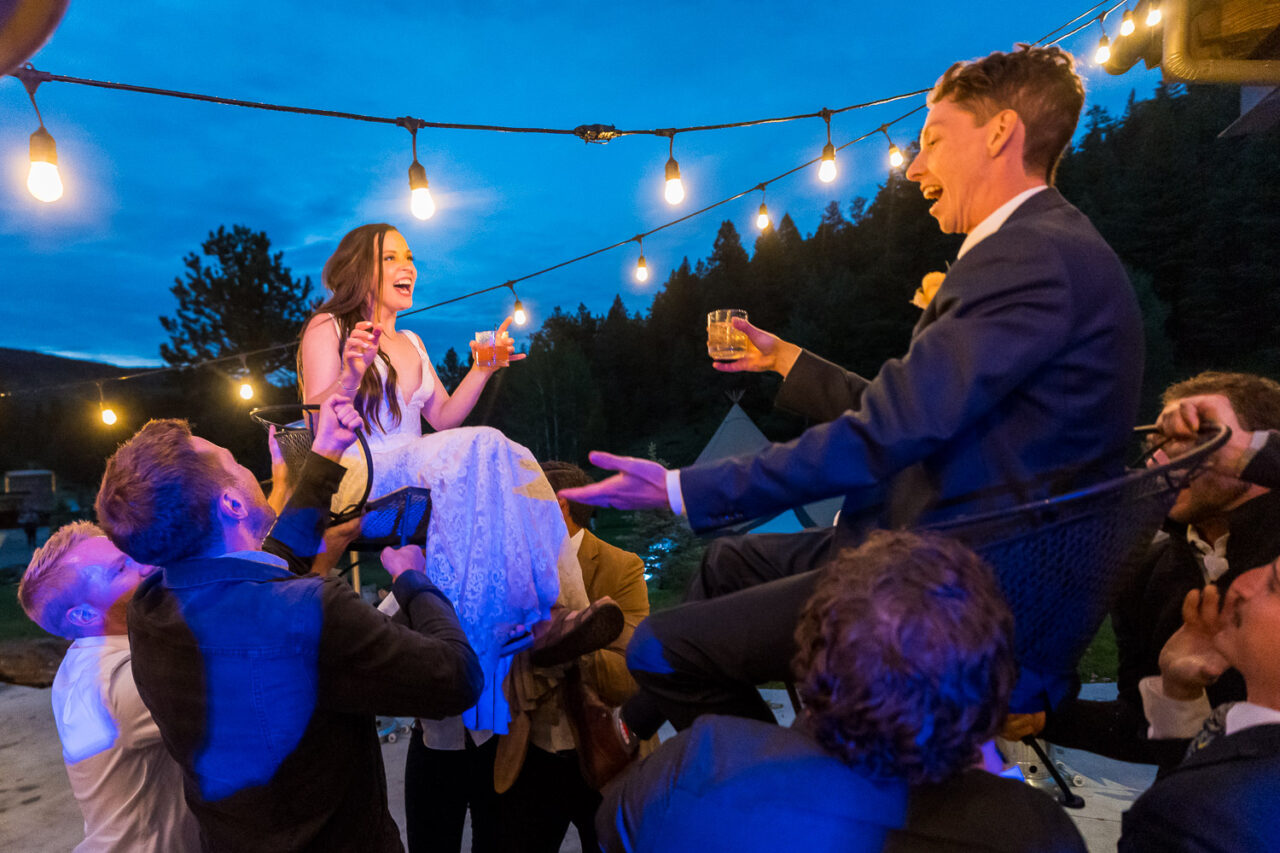
Use Other Light Sources
If the available light isn’t sufficient, consider adding artificial light sources such as flashes, speed lights, or continuous lights. These can help to illuminate the scene and create a more dramatic look. However, be careful not to overdo it, as too much light can make the photos look harsh and unnatural not to mention ruin the vibe of the day.
We’ll probably need to write a whole post on using flash for wedding photography but as you can imagine it’s possible to be very creative with flash.
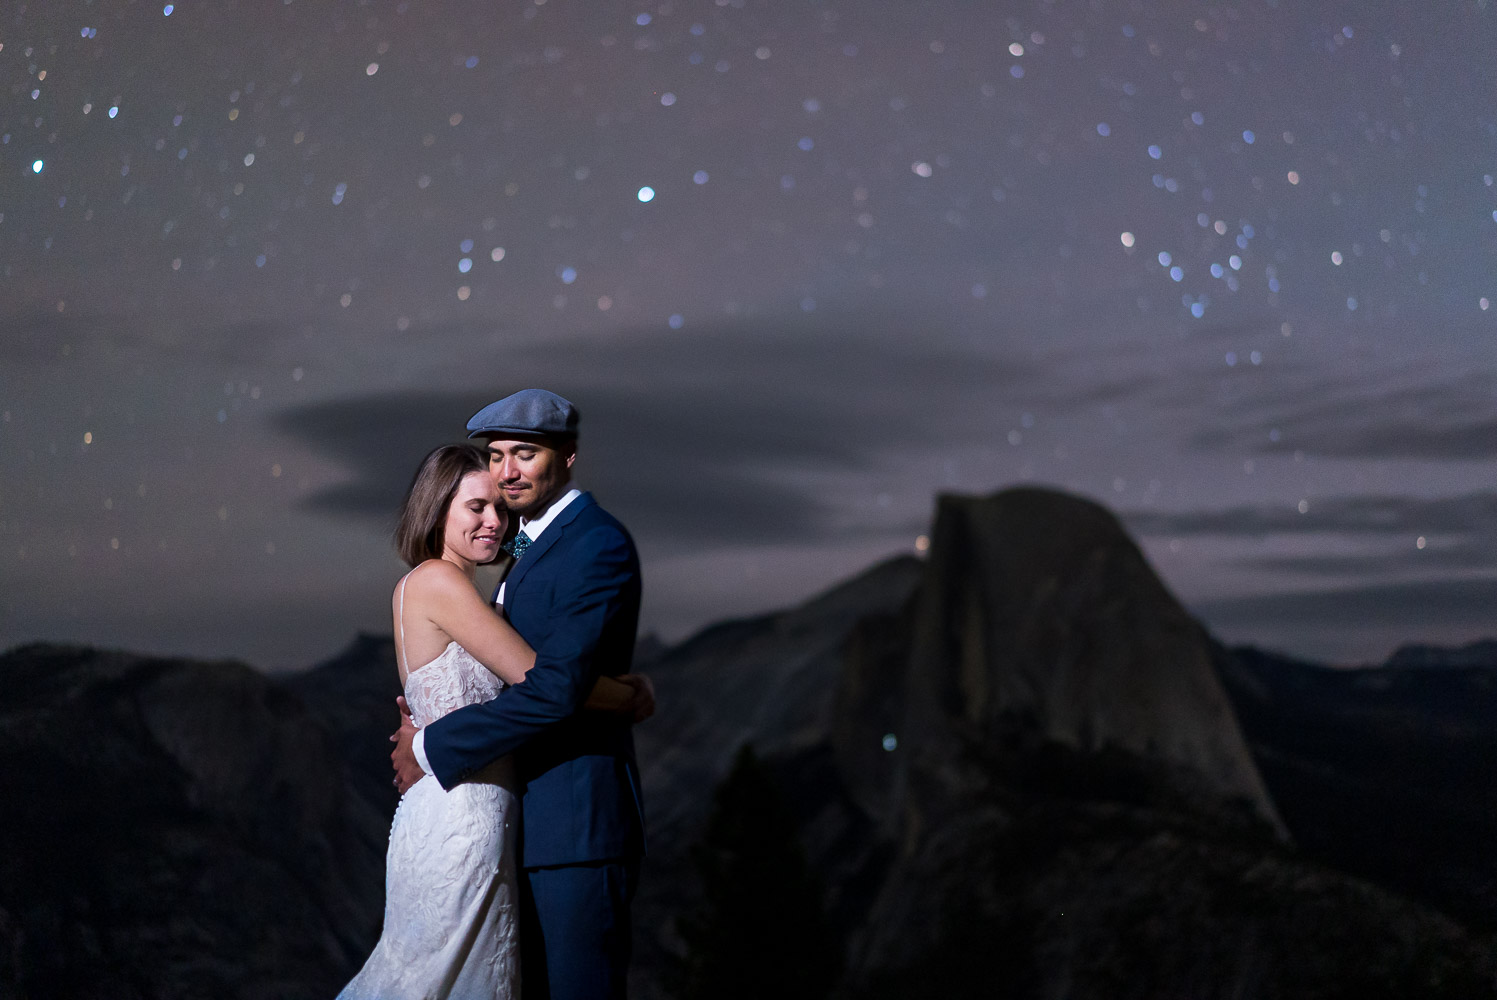
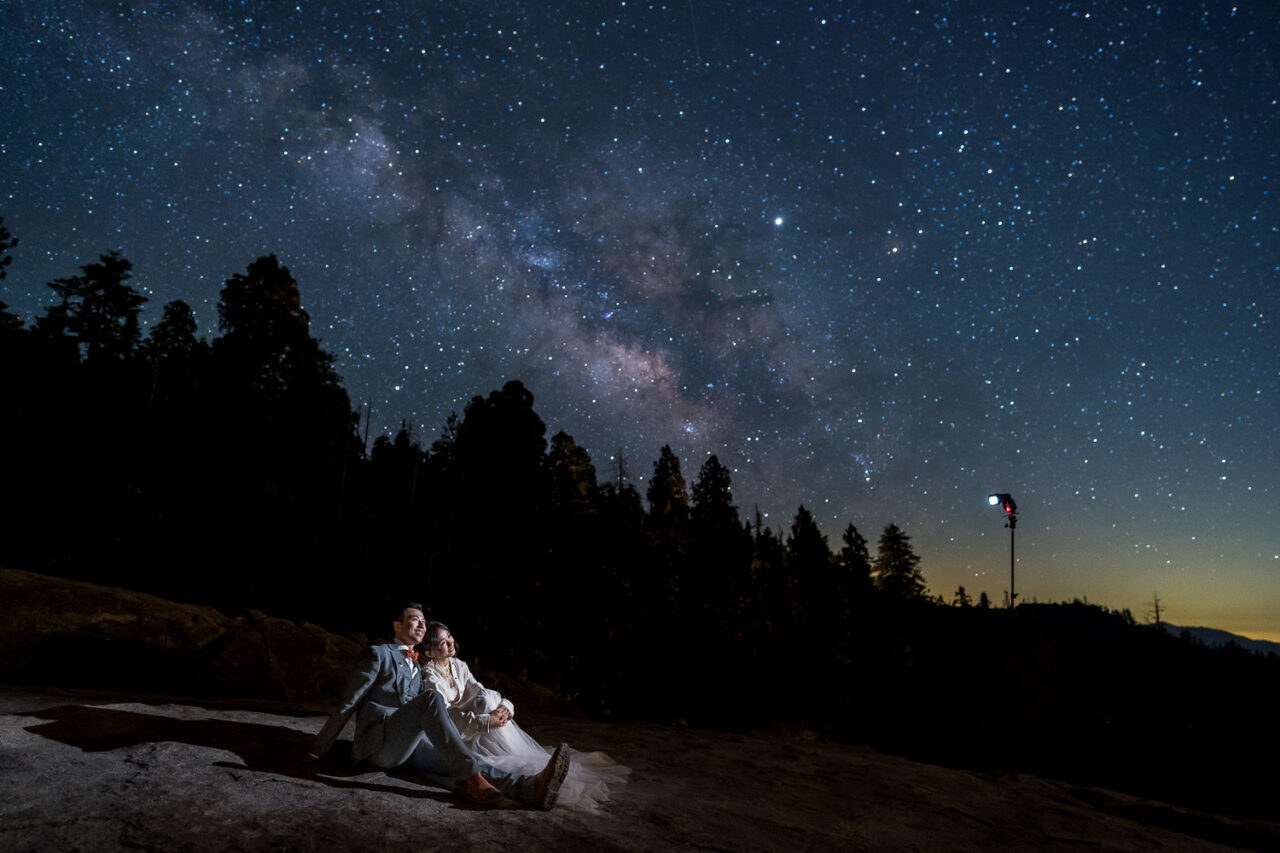
Ambient Light
Amblient light can also be considered as a design element. Picture the beautiful bokeh of market lights or candles in the background. Dark images aren’t always bad, they can create a mood.
Look for layers of ambient light to create an interesting composition. Then get your couple in position and use off camera flash to compliment the scene tastefully.
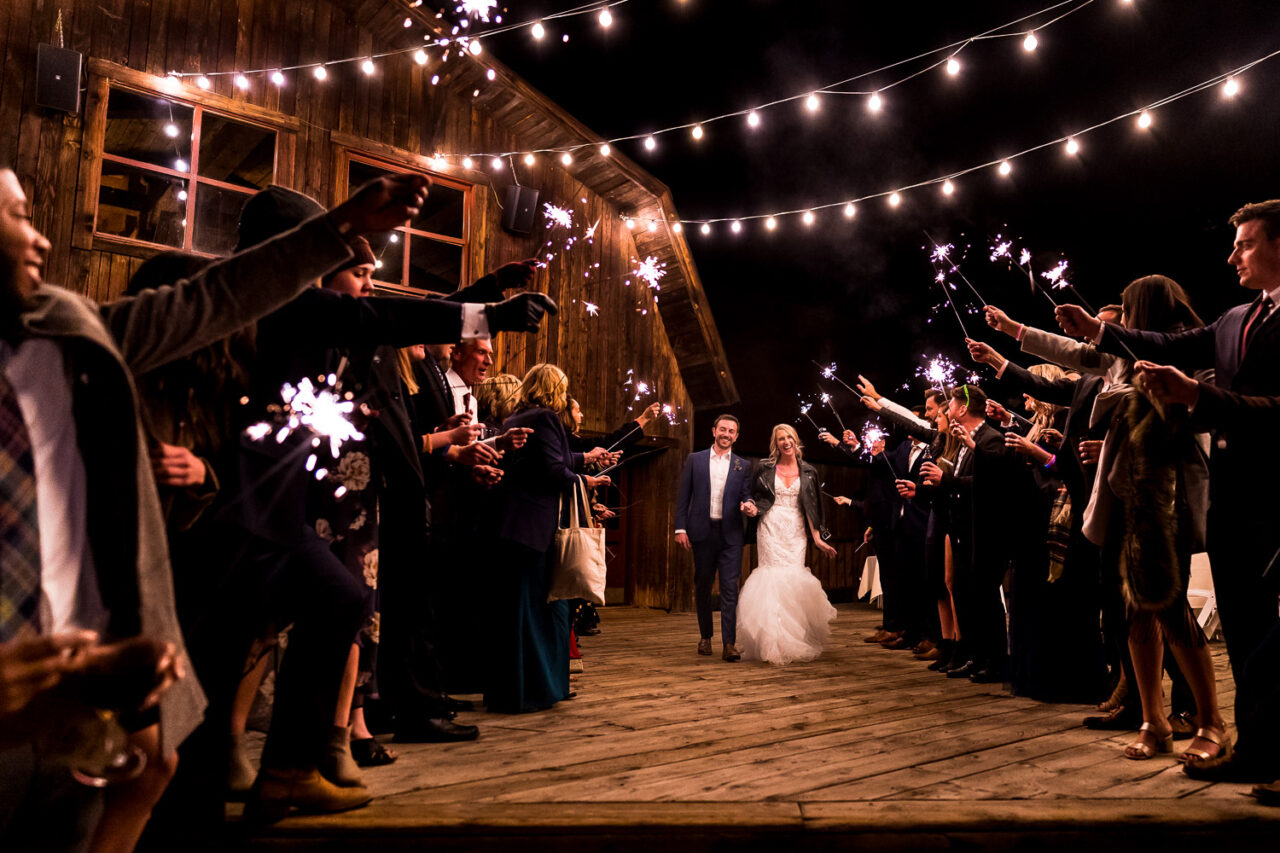
Shoot Long Exposures
If you can’t beat them, join them. Or in this case, if you have to shoot with a slow shutter speed why not capture a creative long exposure?
You might even try combining a long exposure with a flash. Use the flash to freeze the motion of your subject and then let the long exposure capture the motion blur of the surroundings. This is great for sparklers or showing a crazy dance floor.
Using a Tripod or Monopod?
In low light conditions when you might be shooting with a slower shutter speed. It’s important to keep your camera steady to avoid blurry photos. A lot of people suggest a tripod or monopod to help keep the camera stable. You’ll have to consider if it’s practical or makes sense to use one for the image you’re trying to create.
We often find them cumbersome but some images just wouldn’t be possible without a tripod.
Proper Exposure
Some of us have the habit of underexposing images in low light because we’re trying not to push the camera settings too far. We’re afraid to use a slower shutter speed or a higher ISO. In these cases it’s important to remember that if you expose too dark you will lose shadow details. If you’re not maxing out your settings, make sure you have an adequate exposure for the scene. Increasing the exposure in post will add even more digital noise).
Post-Processing
Finally, let’s talk about post processing and how you can edit your low light photos after the fast. Whether shooting a high ISO made your images grainy or you need to open the shadows, there’s a lot you can do with modern software.
Noise Reduction
If you had to shoot at higher ISOs to deal with the low light conditions, you might notice digital noise in your photos. Fortunately, most photo editing software includes a noise reduction tool. Be careful not to overdo the noise reduction, as this can result in loss of detail and a “plastic” look.
Find a preset that works for you and apply it to all the images above a certain ISO (i.e all photos ISO 2000 and above).
Sharpness
If your low light photos lack sharpness due to camera shake or noise reduction you can add sharpening in post-processing. It will help bring back detail and make your photo look more crisp. Be careful not to over-sharpen, as this can result in a “halo” effect around edges.
All the sharpening in the world won’t bring back a completely out of focus or motion blurry images.
Adjust Exposure
When shooting in low light conditions, it’s common to end up with underexposed photos that are too dark because you were trying not to push your settings too much. Adjusting exposure in post-processing can help you recover details in the shadows, bring out more brightness in the photo, or balance different areas of the composition.
Adjust Contrast
Low light photos can often lack contrast, resulting in a flat and dull-looking image. Adjusting contrast can help add depth and dimension to your photos. Use the curves or levels tool to adjust the contrast and make the highlights brighter and the shadows darker.
Summary of Low Light Photography Skills
Shooting a wedding in low light can be challenging, but with the right equipment, techniques, and creativity, you can capture stunning photos that will be cherished for a lifetime. Remember to use the available light, add artificial light if necessary, shoot in RAW, and get creative with your photography. With these tips, you’ll be able to create beautiful and memorable wedding photos, no matter the lighting conditions.
Next, you might tackle other challenges light shooting in the rain or outdoor weddings. Or you might head back to the basics and consider the rule of thirds. Wherever you are in your photography education, wishing you happy shooting.
more educational content:
about the author
I am Brenda Bergreen, one half of a husband and wife photography team specializing in Colorado wedding photography and videography and adventure photography. If you need someone to encourage your creativity, I’m here.
Download our free guide on how to build a creative business and a life you love. Don’t hesitate to contact us and let us know how we can help!
In the meantime, remember to…