Easy to Understand Guide to Camera Settings
Let’s dive into professional camera settings. This is a follow up to my popular wedding settings guide for wedding photographers. I’m excited to share some more practical tips with you to help you make your photos better or to make the act of photography more seamless.
Because sometimes going from amateur to professional is all about your mindset, let’s first get into the professional photographer mindset to help us dive into the camera settings that professionals use. After over a decade of experience as a full time photographer, I still sometimes struggle to feel professional.
And, my husband is a photographer too which means we pay all our bills and buy all of our food based on our photography work. If that’s not professional, I don’t know what is. Let’s start there with how to know when you’re using camera settings like a professional.
How You Know When You’re Using Camera Settings Like a Professional
You know you’re using camera settings like a professional when you can do it intuitively. This isn’t camera settings explained for dummies, it’s camera settings and what they do for people who want to do it naturally. What that means is that you no longer have to over think or over analyze every decision you make. It takes a certain level of knowledge and understanding of camera settings combined with a whole lot of experience.
One day you just realize it’s not as stressful to get the shot as it used to be. The more you shoot the more your instincts will guide you to choose the right camera settings. You’re develop your own auto mode that makes decisions better that the auto mode on your camera.
I don’t even think you have to know everything. Instead, I think you need to know enough of the right things. Combine that with practice and experience and you’ll be set. Next check out this travel photography gear.
Aperture: Because it changes the look of your photos
Aperture is in some ways the most important camera setting because it often has the most impact on the look of our photos in any given photoshoot setting. There’s a wide swath of shutter speeds you can shoot at that won’t change the look of your photo but aperture changes the look. I think that’s why a lot of people end up starting out by shooting in aperture priority mode.
It’s not a bad choice as I’ll talk about in a later section. However, it does limit your control which limits your creativity. I’d much rather you have the goal of shooting in manual mode and having full control.
Regardless of how you shoot you’re going to be choosing your aperture for two main reasons. A wide aperture, low f-stop number, creates that shallow depth of field and bokeh effect that can be really pretty. Additionally, a wide aperture lets in more light which allows more flexibility in your other settings such as being able to shoot at faster shutter speeds.
Best aperture camera settings
As I alluded to above, a wide aperture, low f-stop number, is desirable. It allows you to shoot at a lower ISO and faster shutter speed and it creates that beautiful depth of field. There are times that you might want a higher f-stop number such as a photo there you want a higher depth of field so that more things are sharp.
Generally the best aperture is the lowest one your camera lens is capable of unless it causes you to miss focus or doesn’t allow for the depth of field you’re looking for. Meaning, you might shoot your f/1.8 lens on 1.8 a lot but if you’re worried about nailing the focus point for whatever reason you might shoot f/2 or even f/4 for something like a group photo. You might shoot a high aperture to get a cool sun flare or because you want to shoot a low shutter speed.
Aperture is a key camera setting. It’s impacted by the aperture capability as well as the focal length of the lens that you’re using. For example, a wider lens like a 35mm lens will not show the depth of field bokeh as dramatically as a telephoto lens such as an 85mm.
Shutter Speed: An essential photography setting to capture motion
Shutter speed is often where I play and is the camera setting I adjust the most in order to deal with variable lighting conditions. Often that play has nothing to do with the impact of the shutter speed and is more to maintain an aperture and ISO. However, sometimes playing with shutter speed is the most fun from an impact standpoint because you can capture motion.
Picture a bike speeding through the forest or the milky water of a waterfall. What about playing with shutter speeds when photographing a twirling dress or a crazy dance party. There are times with a slow shutter speed allows you to do something really unique and creative.
Sometimes you’ll want to avoid a slow shutter speed while other times a slower shutter speed will help you achieve a fun effect. And there are times when you might need to use a slower shutter speed than you would like in which case you will try to stabilize yourself to avoid camera shake.
Best Shutter Speed
The best shutter speed is whatever shutter speed allows you to achieve your aperture and ISO goals as long as it is fast enough to avoid motion blur. Unless you’re trying to achieve motion blur. In fast moving environments staying at a fast shutter speed above 1/500 or even 1/1000 can be nice. Otherwise, you generally want to stay above 1/200 or have a minimum shutter speed of 1/ whatever focal length of the lens you are shooting.
If you’re trying to achieve motion blur then you want to go as slow as you can without camera shake. Or if you have a tri-pod you can go even slower. For a waterfall, for example, you might try 1/4 and utilize a variable ND filter if you need more control over the exposure. For star photos you might use 15″ or 20″. Once you get above around 25-30″ you’ll start to get star trails or capture a lot of ambient.
Typically a fast shutter speed is preferred so that you don’t have to worry about camera shake or motion blur. It’s good to have an idea of your minimum shutter speed for various situations you might encounter. Which brings us to our next camera setting.
IS0: Achieving the best dynamic range
ISO is an important camera setting because it deals with the sensitivity of the camera sensor. A low ISO ensures high image quality and dynamic range. However, sometimes you need to bump to a higher ISO in order to handle low light conditions.
Luckily, professional cameras have high ISO capabilities. It’s important to learn the capability of your camera which might be 3200 or even upwards of 6400. You will lose some dynamic range so it’s a compromise but in low light conditions you’re not expecting much dynamic range anyway.
At high ISO you’re going to see more digital noise in your images depending on your camera’s sensitivity. Of the photography settings, ISO is the one that is seldomly used creatively and more used out of desperation. However, high ISO capabilities of advanced digital cameras gives us more creative flexibility within our other settings.
Best ISO camera settings
The best ISO is the lowest ISO that allows you to achieve the approproate shutter speed and aperture. If bright conditions this is likely ISO 100 because you can flexibly adjust your other settings. In lower light conditions, a low ISO might force you to shoot at too slow of a shutter speed causing unintentional motion blur.
Auto ISO
I avoid using auto ISO because I want to know the compromises that I am making. If you end up in low light conditions and use Auto ISO you could find yourself shooting at some crazy high ISO that’s too grainy. I can see where you might not have a choice but there are other compromises to consider such as a slower shutter speed, lower aperture, or adding some light to the scene.
Camera Shooting Modes
After all of that I hope that your decision of camera mode comes easy. I encourage you to have the goal of shooting in manual mode where you have full creative control over the impact of aperture and shutter speed. However, since we’re talking about camera settings it’s worth looking at the camera mode.
Full Automatic Mode (A)
Full automatic mode is when all of the camera settings are fully automatic. While it’s cool that your camera can make decisions for you, fully automatic limits any creative decisions that you might make with your photography.
Aperture Priority Mode (Av)
Aperture priority mode has you choose the aperture and the camera chooses the shutter speed. The camera uses its light meter to choose the appropriate shutter speed. The way I shoot, aperture priority mode seems like a reasonable choice.
However, I don’t like my camera making decisions for me that might limit my creativity. Especially because you can learn shortcuts that don’t actually require you to choose settings for every photograph but rather have a plan for how you shoot in various situations.
Shutter Priority Mode (Tv)
Shutter priority mode has you choose the shutter speed and the camera chooses the aperture. Again, the camera uses the light meter to ensure a proper exposure. You might use shutter priority mode if your main concern is capturing motion in a certain way.
Manual Mode
Lastly, we get to manual mode. As you already know, I love to have full control over my aperture, shutter speed, and ISO. Shooting in manual mode isn’t as complicated as it sounds once you understand how the settings work and how you plan to use them in your photography.
Pick the Best Aperture, Shutter Speed and ISO Settings
When it comes time to pick your basic camera settings, you’ll want to have an idea of your goals. Frequently your goal will have you starting with the lowest ISO possible for the scene where you won’t end up with a too slow shutter speed. Then you’ll choose your aperture based on your intended depth of field. And finally, you’ll adjust your shutter speed as you move around the scene keeping proper exposure.
If you’re not in variable lighting conditions then you might put a little more thought into the settings. If there is less light you’ll want to pay more attention to your shutter speed settings to ensure you don’t dip below your minimum.
Focus Camera Settings – Important to take sharp photos
Next up for camera settings is focus modes. There’s probably a lot to say but there’s also less and less to say as cameras focus better and better even when there’s less light.
Focus mode is the method used to focus the camera lens, such as automatic or manual. The focus mode determines how the camera’s autofocus system works. There are several focus modes available on most cameras, including single-shot autofocus (AF-S), continuous autofocus (AF-C), and automatic autofocus (AF-A). Each of these modes is useful for different shooting situations however I tended to stick to continuous autofocus for most situations.
single-shot autofocus (af-s):
This focus mode is useful for still subjects, such as posed portraits or still-life details. In this mode, the camera locks onto the subject when the shutter button is pressed halfway. It remains locked until the image is captured. This mode was great for older DSLR cameras that didn’t have as efficient autofocus as modern mirrorless cameras.
continuous autofocus (af-c):
This focus mode is useful for moving subjects, such as action sports or during a wedding ceremony or the wedding reception. In this mode, the camera continuously adjusts the focus as the subject moves, allowing the photographer to capture sharp, in-focus images.
Most modern mirrorless cameras have excellent autofocus and can easily lock onto a subject.
automatic autofocus (af-a):
Automatic autofocus mode is a combination of the above two, and is useful for situations where the subject is moving but may stop. In this mode, the camera automatically switches between single-shot autofocus and continuous autofocus, depending on the movement of the subject. I don’t recommend this mode for wedding photographers because it doesn’t give you as much control over your camera. The most important thing is to know what your camera is doing at all times. I find the best and most consistent results when I make all the decisions.
manual focus
If there are low light conditions and the autofocus system is struggling we sometimes switch to manual focus. It has to be very dark but in situations like long exposures of the couple with the stars, manual focus is very helpful.
Drive Mode – A fun camera setting for fast paced life
Drive mode is a fun camera setting to be aware of and it can be useful in certain situations. You might also have heard this as burst mode.
What are the drive modes camera settings?
There are several types of drive modes available on most cameras, including single-shot, continuous low, continuous medium, and continuous high. Single-shot mode takes one photo each time the shutter button is pressed, while continuous low, medium, and high modes take multiple photos per second. Continuous high mode is particularly useful for capturing fast-moving subjects such as dancing guests or popping champagne, while continuous low mode can be useful for capturing more subtle moments such as the bride and groom exchanging glances.
It’s worth noting that using drive mode will result in a lot of photos which can drain the battery, fill the car, and also require a little buffer time before the next thing.

Metering Modes – The camera setting that measures light
Next let’s talk about metering modes. Metering modes measure light and help make camera settings decisions when you’re shooting in aperture priority mode. Metering modes include center-weighted metering, spot metering, and matrix or evaluative metering.
The different metering modes measure light and use it to calculate exposure. It’s pretty much as it sounds with center-weight metering mode measuring the light at the center, spot metering mode measuring at a spot typically your focus point, and evaluative metering mode measuring the whole scene.
As Sony mirrorless shooters that utilize manual mode, we don’t use metering in the way we would have in the past. Instead, the exposure is locked in by out settings but there is a light meter at the bottom of the screen that will help you asses your exposure.
Basic Camera Settings
Let’s review the three basic camera settings:
Aperture is the size of the opening
Shutter speed is the speed of the shutter
ISO is the sensitivity of the sensor
While these three camera settings are often considered the basic camera settings, that doesn’t mean they’re simple to understand. The trick with the exposure triangle is that each of these camera settings is influenced by the other.
Once you understand how aperture impacts shutter speed impacts ISO you’ll start to understand how a basic camera makes decisions while in auto mode. Soon auto mode won’t be a setting on your camera but rather a setting in your head because you’ll be able to automatically know what settings you want to use.
Want to better understand the exposure triangle? Check out the video below:
Sample Problems with Best Camera Settings
Let’s walk through my train of thought for various situations and see how all the camera settings shake out. See if you follow my train of thought, agree with my choices, or how you would do things differently. I’ll start with a scenario and them talk through how I decide what my camera settings should be.
Sometimes there are different camera settings that result in an equally good photo. It’s good to be aware of how to think through a problem so that you can do it on the spot. However, sometimes you can simply let your instincts take over and then break down why it worked later.
Knowing which camera setting you want to start with is a good place to start because all the settings play off of each other. Additionally, the more the can simplify the better. What I mean is that if you can set two settings and keep one flexible as you move through a scene it simplifies the decisions and mistakes you might make shooting on manual.
A Dimly Lit Room
I walk into a dimly lit room where people are moving around at a moderate pace. My desire is to capture some images of the people mingling. First I know that I’m going to need a fast lens so I put on a 35mm f/1.8.
Then with my aperture at 1.8 and a shutter speed of about 1/200 I aim towards a dark area of the room and see that I’ll need atleast an ISO of 2000. I decide to set it at 3200 willing to compromise some dynamic range for not risking too low of a shutter speed. I then shoot a series of images at f/1.8, ISO 3200, and a shutter speed anywhere between 1/200 and 1/1000 depending on where I am in the room.
In this example I’m limited by low light so I’m choosing a balance between sacrificing potential grain from a high ISO and risking motion blur from a slow shutter speed. I’m also trying to find a compromise where I can move throughout the room without having to change all of my settings.
A Bright Sunny Day
It’s a bright sunny day and I’m shooting nature photos outside. I have a low aperture lens because I want to create a shallow depth of field. Next, I choose an ISO of 100 because I’m not at all concerned about low light.
Finally, I’m able to choose my shutter speed based on how much light there is how the scene looks through my mirrorless camera perhaps referencing the light meter. In this case the aperture determines everything else.
For bonus points, what if I want to create a cool sunburst effect instead of a shallow depth of field or I want everything to be in focus? I simply bump my aperture up and lower my shutter speed accordingly.
Intentional Blur
Let’s take a scenario where I want to capture motion blur of a mountain biker. I choose 1/100 because it feels slow enough that the mountain biker will be blury but not so slow that they’ll be illegible. Since I have a slow shutter speed I can set ISO 100 because I’m not worried about a lack of light.
Finally, I’ll adjust my aperture based on how much light there is and how the scene looks through my mirrorless camera perhaps referencing the light meter. In this case the shutter speed determines everything else.
It’s nice to experiment with different shutter speeds for different scenes so that you know limits. What if you try shooting a waterfall at 1/4, 1/10, and 1/100 in order to see the differences? Can you visualize it or do you need to try? This is where experience comes in because sometimes you learn something best by failing at it in a different attempt.
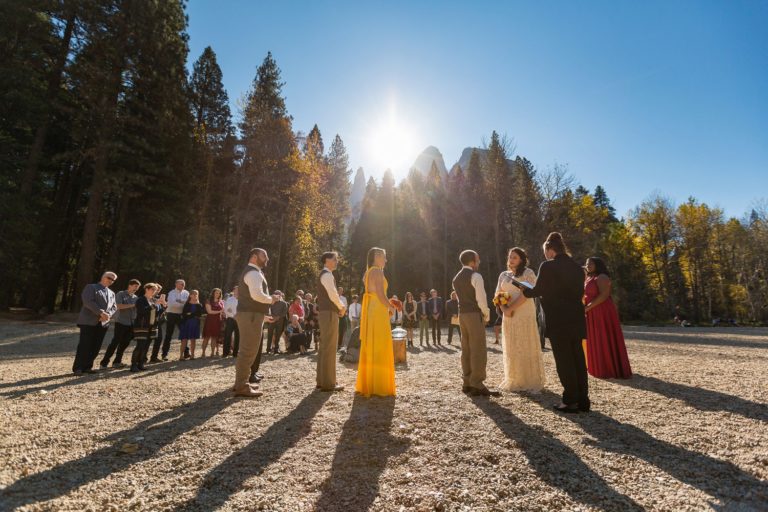
Wedding Photography Camera Settings:
The videos embedded into this post are mostly focused on camera settings for wedding photographers but you might find them helpful regardless of the type of photography you shoot. Wedding photography is one of the most challenging genres because there’s a wide variety of lighting conditions and creative expectations to tackle while under stress.
Hopefully, the tips will help you move beyond automatic mode so that you can consciously and intentionally use aperture shutter speed and iso. You may start with a basic camera setting understanding and then eventually lear to play with more technical things such as slower shutter speeds.
My advice for beginner photographers is always to start with one new challenge at a time. Don’t try to do everything but pick something to master and practice it. Eventually all of the new skills will add up like tools in your tool belt and you’ll no longer have to think about what you want to do because it will be instintual.
File Type
One last camera setting is to shoot raw files so that you have more editing capabilities. You might even shoot both raw and jpg depending on your workflow. I also encourage dual-card slots.
Final remarks for finding the right Camera Settings
Finding the right camera settings will help you take better photos so learn these camera options. That might mean you’re more creative or you’re more consistent. Or it might make it easier for you to make quick decisions and nail the shot that you might have otherwise missed. Start with the basic camera settings and add more knowledge as you grow.
There are some aspects of camera settings you don’t have to thing about on a daily basis while there are others that you’ll make conscious decisions around. Whether you’re staring in aperture priority or learning to master aperture and shutter speed by shooting in manual, the exposure seddings are the most important camera settings to master.
Luckily, they’re also the most practical settings to master because the more you shoot the more you’ll adjust exposure settings until eventually you’re nailing the proper shutter speed without even thinking about it. Then, you’ll even get faster at your post processing because your getting the image right in camera.
more educational content:
This was one of my favorite camera guides yet! I hope it helped you with camera settings for family portraits, weddings, and beyond. Let me know what else you want to learn!
about the author
I am Brenda Bergreen, one half of a husband and wife photography team specializing in Colorado wedding photography and videography and adventure photography. If you need someone to encourage your creativity, I’m here.
Download our free guide on how to build a creative business and a life you love. Don’t hesitate to contact us and let us know how we can help!
In the meantime, remember to…