Wedding Settings Guide for Photographers
As a photographer, capturing the perfect shot on someone’s wedding day can be both exhilarating and nerve-wracking. The right camera settings can make all the difference in creating stunning, memorable photographs. In this Wedding Settings Guide, I’ll be discussing some wedding photography tips for your camera settings that will help you capture amazing wedding photographs on the big day.
First, we’ll talk about understanding camera settings and how they apply to wedding photography. Then I’ll talk about the best wedding settings to use. I’ve been a professional wedding photographer for over a decade and it’s imperative to understand your gear so that it can make you better.
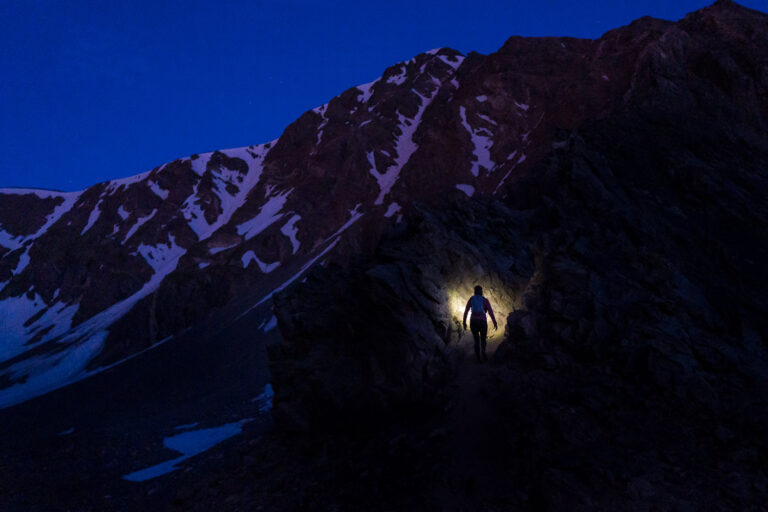
This guide will help you whether you’re shooting natural light on a mountain top or off-camera flash on the dance floor at a wedding party at night. After all, you need to be able to shoot both! Too advanced? Check out our post on tips for beginners or this basic camera settings guide or our ND filter guide.
If you’re here, it’s a sign! Let’s find some beauty and capture it!
Understanding Wedding Photography Camera Settings
Below are several camera settings that can be adjusted to control the exposure, focus, and other aspects of your wedding photographs. We’ll talk in-depth about how understanding each of these can make you a better professional wedding photographer.
Exposure Triangle: Aperture, shutter speed, ISO (and exposure compensation)
White Balance
Focus Mode
Metering Mode
Image Quality
Drive Mode
Flash Settings
After we run through these settings we’ll talk about which camera settings to use based on the situation you’re in. And then we’ll talk about how we choose our wedding photography gear based on the settings we need to utilize.
Understanding the Exposure Triangle
If you need to, back up and check out this post on understanding the exposure triangle.
Aperture
The aperture, or the opening in your lens, is a crucial setting when it comes to wedding photography. A wider aperture, such as f/1.8, will create a shallow depth of field. This will allow you to isolate your subject and create that coveted “bokeh” effect in the background.
However, a narrower aperture, such as f/5.6 or f/8, will provide more depth of field. This is great for capturing larger groups or landscapes. You would use a higher f-stop number aperture for group photos (family photos and large group photos) to ensure everyone is sharp even if they aren’t perfectly in the same focal plane.
A fast lens with a wide aperture will allow you to shoot in low light conditions without a flash with less stress about your focal point. This can be less intrusive and more natural. Despite this, off camera flash can add a whole new dimension to your images.
Don’t pigeon hole yourself as a “natural light” photographer because you bought a fast lens. It’s about the quality and directionality of the light. It’s not just about having a wide enough aperture to shoot in the darkest environments. You’ll consider the same things when determining the best aperture for low light video.
Shutter Speed Settings
The shutter speed determines how long your camera’s sensor is exposed to light. A faster shutter speed, such as 1/1000th of a second, will freeze almost any movement. This is perfect for capturing those quick moments like the first dance. On the other hand, a slower shutter speed, like 1/20th of a second, will create a sense of motion blur.
This can be great for capturing the flow of a wedding dress. You might even experiment with speeds as slow as 1/10th of a second to give your images an ethereal feel. Do this sparingly as the images will be mostly blurry.
ISO
ISO refers to your camera’s sensitivity to light. A higher ISO, such as 3200 or 6400, will allow you to shoot in low light conditions without a flash. However, it may also introduce more digital noise in your photos. A lower ISO, such as 100 or 200, will produce cleaner images. But, you’ll need more light to achieve the correct exposure. Also, you should use the lowest ISO setting on your camera to get the best dynamic range. If you want to have a lot of detail in the highlights and shadows in high-contrast scenes, you’ll need as much dynamic range as possible.
Exposure Compensation
The adjustment of the exposure value in order to make the image brighter or darker. This is only applicable while using one of the automatic modes such as shutter speed priority (S) or aperture priority (A). It can also be used in Program mode (P) but won’t work in Automatic (A) mode. Some people use this as a way to transition toward shooting in full manual mode. They leave one element of the exposure triangle on auto mode and use the exposure compensation dial to adjust. I find this method to be overly complicated and encourage people to dive right into shooting in full manual mode. It may feel intimidating at first but with some practice, you’ll be spinning dials faster than you thought possible!
White Balance
White balance refers to the color temperature of your photos, which can be adjusted in-camera or in post-processing. Tungsten lighting, for example, can create a warm, yellow-orange color cast in your photos, while fluorescent lighting can create a cool, blue-green color cast. It’s important to adjust your white balance settings to accurately capture the colors in the scene. The most important thing to do is shoot in RAW so that your photos can be adjusted in post. White balance is a setting that can be non-destructively edited later as long as you shoot in RAW. With most modern cameras auto white balance will get close. You may tweak it slightly in post so that all your images have the same tone. If you’re shooting video, you won’t be able to easily edit white balance. Make sure you get this set correctly in the camera especially with indoor wedding videography. Additionally, don’t forget to adjust it each time you enter a new room.
An Argument for Shooting in Manual Mode
As an experienced wedding photographer, I understand the importance of capturing every precious moment on a couple’s special day. The lighting conditions can change rapidly and can vary greatly from one location to another. In order to produce high-quality and consistent results, shooting in manual mode is essential. It will be slower at first but soon you’ll be a master of your camera settings and know exactly what settings to adjust to get the proper exposure.
When shooting in manual mode, the photographer has full control over the camera’s settings, including aperture, shutter speed, and ISO. This allows for precise adjustments to be made based on the lighting conditions and the desired creative vision for each shot. Shooting in manual mode also ensures that the photographer can maintain consistent exposure across all photos, which is crucial for creating a cohesive and visually stunning wedding photo album. It also makes culling and editing much faster. Applying bulk edits instead of adjusting each image can save a huge amount of time.
But shooting weddings in manual mode is not just about technical control. It also requires the photographer to be highly attuned to the emotions and experiences of the couple and their guests. In order to capture the special moments that unfold throughout the day, the photographer needs to be present and empathetic. Shooting in manual mode allows the photographer to focus on the people and the emotions, rather than being distracted by constantly adjusting the camera’s settings. I recommend locking in your settings for a particular scene and then focusing on anticipating the moment. Thinking ahead to what will happen next allows you to adjust your settings prior to the moment happening. This anticipation is key to capturing the peak of the moment.
Manual Versus Aperture Priority Mode
Aperture priority mode can be a simplified way to start transitioning to shooting in manual mode. However, it also means that the camera has control over the shutter speed limiting your creative control. One of the primary reasons why a wedding photographer might choose aperture priority is to control the depth of field. By setting a low aperture, they can control how much of the scene is in focus, creating a shallow depth of field. Alternatively, they can increase the aperture for a sharp focus throughout the image. The danger here is that your exposures will vary from image to image making it harder to cull/edit after the event because the camera will meter each image separately.
Stop shooting in Aperture Priority
Shooting in aperture priority mode could be useful in situations where the lighting conditions are consistent, and the photographer wants to maintain consistent exposure throughout the shoot. However, in situations where the lighting conditions are constantly changing, the camera will adjust the shutter speed to maintain the exposure. Think fast-moving clouds with the sun going in/out. This can result in images that are either overexposed or underexposed if the lighting changes dramatically.
Additionally, aperture priority doesn’t work if the wedding photographer is trying to capture motion in their shots. Lastly, in low light situations, the camera may select a slower shutter speed to maintain the exposure, which can result in images that are blurry due to camera shake. It seems like a great option at first but it doesn’t work all the time. Many cameras have the ability to set a minimum shutter speed for aperture priority so you avoid blurry photos. I recommend at least double your focal length as a minimum. I.e. 200mm lens should have a 1/400 of a second minimum shutter speed. This is only a starting point though because if your subject is moving quickly, this may not be fast enough to freeze the motion. I recommend you test various shutter speeds and see what works for you.
Manual Versus Shutter Priority Mode
One reason why a wedding photographer might choose to use shutter priority mode is if they need to freeze motion in their shots because they’re worried about camera shake as I mentioned above. For example, if they are shooting a couple’s first dance or a candid moment where the subject is moving quickly. Then, they may want to use a faster shutter speed to avoid motion blur. In this case, setting the shutter speed to a specific value in shutter priority mode allows the photographer to ensure that the camera is selecting the correct aperture & ISO to achieve the desired exposure.
On the other hand, like aperture priority, shutter priority mode doesn’t always work. For example, if the lighting conditions are changing frequently or if there are significant variations in the light levels within a scene, the camera may not be able to select the ideal aperture to achieve the desired exposure.
In this case, shooting in manual mode is a better option. It allows the photographer to adjust both shutter speed and aperture independently to achieve the desired exposure.
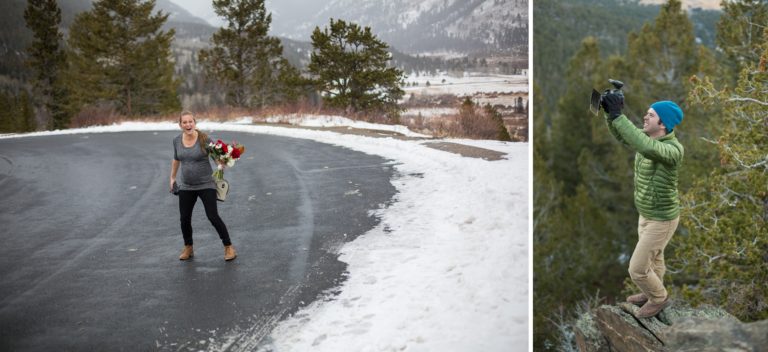
It all depends on how well the camera can meter a scene and determine the best exposure but I prefer to be in charge of the camera instead of letting it decide how my picture should look. An example of a situation where cameras often get the default exposure wrong is in the snow. Because cameras want to meter everything to an 80% gray value, snow will cause your images to be underexposed.
This further illustrates why shooting in full manual is a better choice.
Shooting in Full Manual Mode

As I mentioned above, shooting in full manual mode will give you the most consistent results. And it will force you to understand your camera better. Additionally, when you introduce off-camera flash, a solid understanding of how to shoot in manual mode will be very helpful. It can be tricky to know what settings to adjust when you add flash into the mix. It adds a fourth variable in the exposure triangle. After you’ve been shooting weddings manually for a while, things will be much easier when adding flash to the mix.
Focus Mode
Focus mode is the method used to focus the camera lens, such as automatic or manual. The focus mode determines how the camera’s autofocus system works. There are several focus modes available on most cameras, including single-shot autofocus (AF-S), continuous autofocus (AF-C), and automatic autofocus (AF-A). Each of these modes is useful for different shooting situations within wedding photography. Your chosen camera may label these differently but most modern cameras have a similar setup.
Single-shot autofocus (AF-S):
This focus mode is useful for still subjects, such as posed portraits or still-life details. In this mode, the camera locks onto the subject when the shutter button is pressed halfway. It remains locked until the image is captured. This mode was great for older DSLR cameras that didn’t have as efficient autofocus as modern mirrorless cameras.
Automatic autofocus (AF-A):
This focus mode is a combination of the above two, and is useful for situations where the subject is moving but may stop. In this mode, the camera automatically switches between single-shot autofocus and continuous autofocus, depending on the movement of the subject. I don’t recommend this mode for wedding photographers because it doesn’t give you as much control over your camera. The most important thing is to know what your camera is doing at all times. I find the best and most consistent results when I make all the decisions.
Continuous autofocus (AF-C):
This focus mode is useful for moving subjects, such as during the wedding ceremony or the wedding reception. In this mode, the camera continuously adjusts the focus as the subject moves, allowing the photographer to capture sharp, in-focus images.
When it comes to wedding photography, some photographers choose the Focus Mode based on the specific shooting situation. For example, during the ceremony, the photographer may want to use continuous autofocus mode. This will ensure they capture sharp images of the couple, even as they move down the aisle or exchange vows. During posed portraits or still-life details, the photographer may prefer to use single-shot autofocus mode. This will ensure that the subject remains sharp and in focus.
However, we don’t really like changing our focus mode throughout the day. We almost always keep it on continuous autofocus mode. Most modern mirrorless cameras have excellent autofocus and can easily lock onto a subject.
Manual Focus
If there are low light conditions and the autofocus system is struggling we sometimes switch to manual focus. It has to be very dark but in situations like long exposures of the couple with the stars, manual focus is very helpful.
Back Button Focus – THE MOST IMPORTANT SETTING
The most important setting you can set up on your camera (in my opinion) is back button focus. This setting separates focusing and shutter actuation. This means that you can focus with one button and take photos with another. The biggest advantage is that it will allow you to take a photo at any time, with no need for the camera to lock focus prior to taking a photo. It also avoids the dreaded re-focus right at the peak moment.
A good example is during speeches. Many times the speaker will stand in one spot and I can lock focus one time before taking a series of images. It allows me to be acutely aware of the moment instead of worrying about if the shot is focused or not.
Get Control – Back Button Focus
Back button focus is the one setting that will give you the most control over the focus system in your camera. When you hold down the button with the continuous focus turned on, it will track a subject. As soon as you release the focus button, the camera will stop focusing. You can take as many photos as you want during this process independent of what the camera thinks about the image being in focus.
Many people may argue that pressing the shutter button halfway will give you a similar effect but the biggest difference is that your camera will focus every time. What if you want to take a photo without re-focusing? That is where back button focus is essential!
This setting can feel awkward at first but I promise you’ll get comfortable with it and wonder why this setting is not the default on all cameras. It becomes second nature to focus with your thumb and trigger the shutter with your pointer finger. Give yourself a few days to master this but it will make photographing weddings so much easier.
Metering Mode
Metering mode is the method used to measure the light in the scene, such as spot or matrix metering modes. Since we shoot in manual mode and with mirrorless cameras, we don’t use metering in the same way we might have in the past but it’s still useful to understand. In situations with high contrast or extreme lighting conditions, metering can help you adjust your exposure to avoid overexposed images.
If you shoot in manual mode, the exposure is locked in but the light meter at the bottom of the screen inside your viewfinder will give you an assessment of whether your images is over/under exposed.
Center-weighted metering:
In center-weighted metering mode, the camera measures the light in the center of the frame and uses this information to calculate the exposure. This mode is useful when the subject is centered in the frame and there is a significant amount of contrast between the subject and the background. It ensures that your subject is properly exposed.
Spot metering:
In this mode, the camera measures the light at a specific point in the frame, typically at the center of the focus point (check your camera manual to confirm this, some are only able to use spot metering at the center of the frame regardless of where your focus point is set). This mode is useful for taking photos when the subject is backlit or when there is a significant amount of contrast between the subject and the background. If the people in the frame are the most important element, it’s critical to make sure you have proper exposure on their faces.
Matrix, evaluative or multi-metering mode:
In this mode, the camera measures the light throughout the entire frame and uses this information to calculate the exposure. This mode is useful when there is an even distribution of light throughout the scene and when the subject is not significantly brighter or darker than the background (i.e. not in the snow or against a black backdrop)
Image Quality: Shooting in Raw
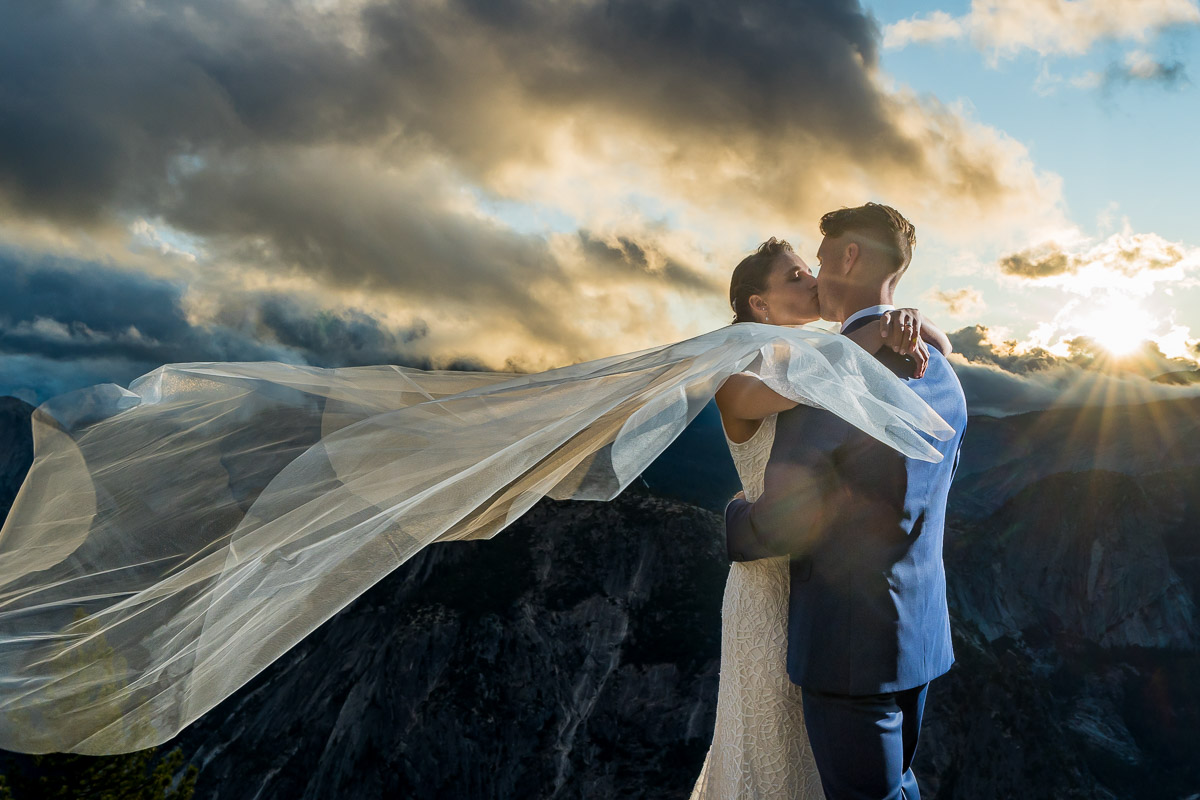
Image quality refers to the level of compression and file format used to save the image, such as JPEG or RAW. Shooting in RAW format will give you more flexibility in post-processing and allow you to adjust exposure, white balance, and other settings without losing image quality.
One thing to note here is that it can be nice to shoot in both RAW and JPEG modes. We use this setting to get a small secondary file alongside the raw file to make culling in Photo Mechanic much faster. Set up your JPEG files in the small or medium setting to get a quick preview to pair with your RAW files for culling.
Your camera may also come with the option for compressed or uncompressed RAW files. I typically recommend the uncompressed because you’ll have more data to work with and the camera’s buffer takes longer to clear if you’re using compressed file settings.
Drive Mode
There are several types of drive modes available on most cameras, including single-shot, continuous low, continuous medium, and continuous high. Single-shot mode takes one photo each time the shutter button is pressed, while continuous low, medium, and high modes take multiple photos per second. Continuous high mode is particularly useful for capturing fast-moving subjects such as dancing guests or popping champagne, while continuous low mode can be useful for capturing more subtle moments such as the bride and groom exchanging glances. Some cameras have a continuous high+ mode. This mode may lock focus, especially if you use an aperture above f/8. Read the fine print in your camera manual. I just don’t want you to make the mistake of selecting high+ mode for a key moment then having everything be out of focus.
It’s worth noting that using drive mode can quickly fill up a camera’s memory card and drain the battery more quickly. It’s important to be mindful of these factors when using this setting. You don’t want to fill up your camera on the first kiss and then miss the bride and groom walking down the aisle. You will have a certain number of files in the cameras buffer before it must eventually write all those images to the camera’s memory card which can be a slow process (this is where investing in a high end memory card can save you). Additionally, you won’t be able to adjust some settings while the camera is clearing the buffer. It’s also important to be aware of the noise created by the camera’s shutter when shooting in continuous mode, as this can be distracting during the ceremony or other quiet moments.
Silent Shutter
Many mirrorless cameras have the ability to shoot with a silent shutter (completely electronic, no mechanical actuation). This feature is one of our favorites for shooting wedding ceremonies. Being completely silent is awesome but it does have some issues. First off, I would recommend you almost never use it inside.
Avoid Flicker
Some lights that flicker at a certain frequency can cause large black bars across your image. The images will be impossible to recover from. We’ve tried lots of different things to avoid this but nothing works:
- Shooting at a shutter speed that matches the frequency of the light 1/50 or 1/60
- Shooting test shots to make sure it’s not an issue in that particular room
The bottom line is, even with taking test shots, you may go into a different room with different style lights. We’ve had to throw away so many photos that we recommend you avoid silent shutter indoors.
Avoid Distortion
The second issue we’ve had with the silent shutter is a bit of distortion at longer focal lengths. A fully electronic shutter reads the sensor line by line. This means that even at 1/8000 of a second, the image can look distorted with fast camera movement on a 200mm lens. If you’re shooting a fast subject beyond 50mm and you’re going to want to avoid a silent shutter with.
The Best Wedding Settings for Different Parts of the Day
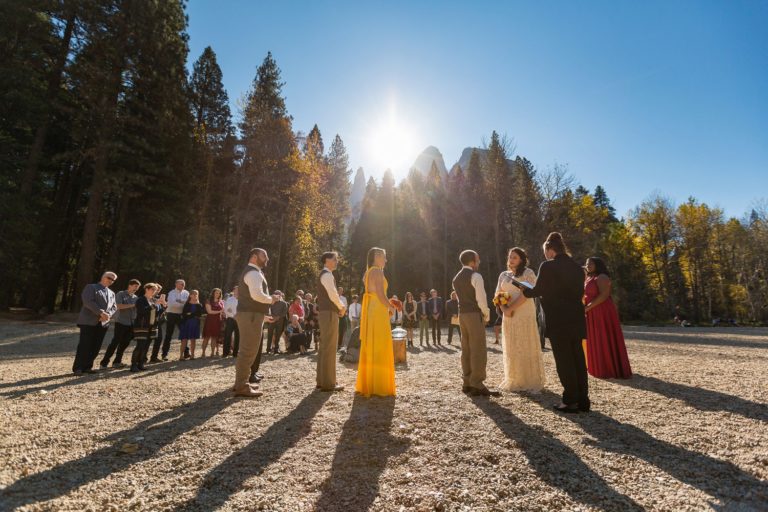
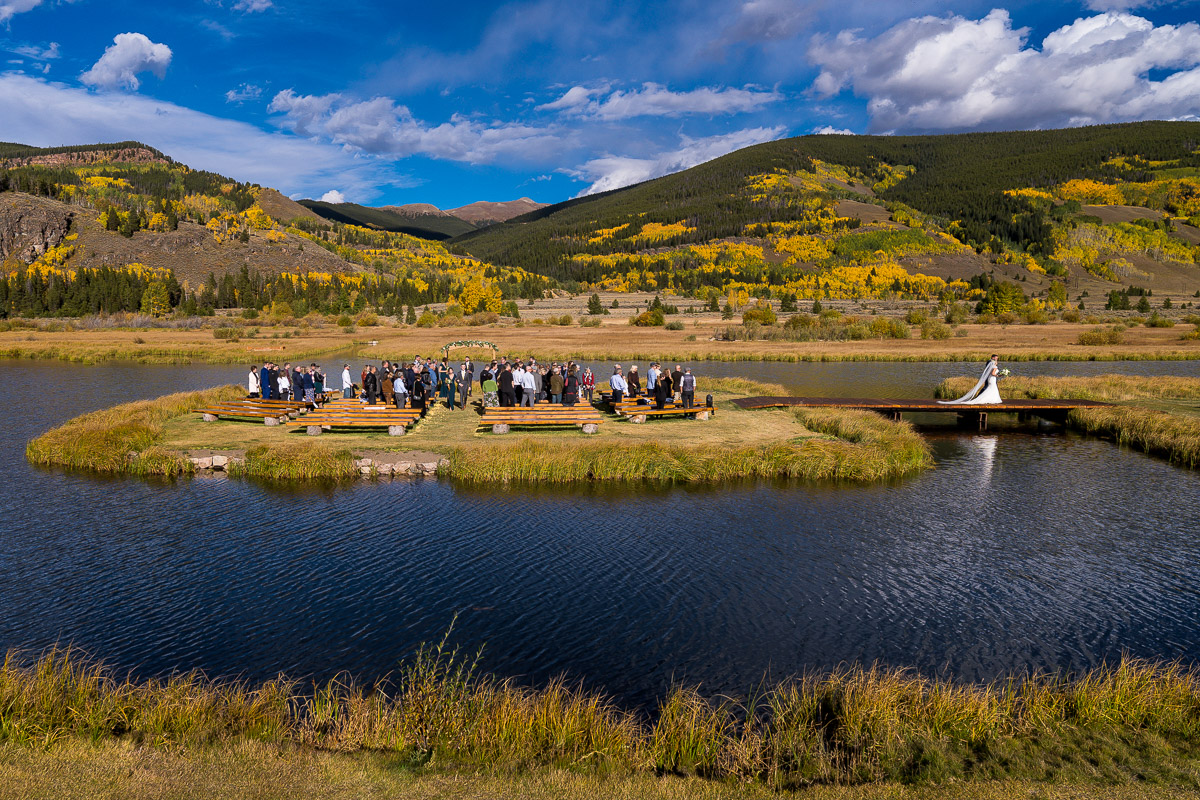
The Best Camera Setting for Outdoor Wedding Photography
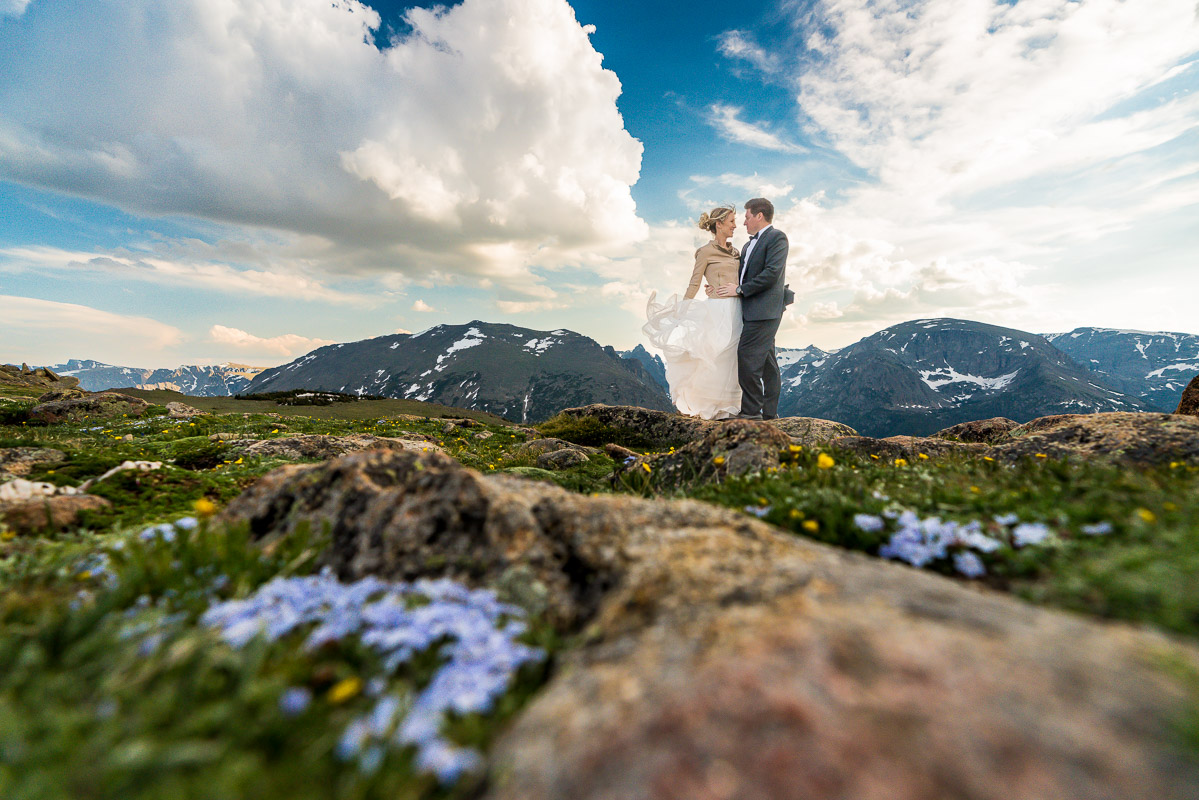
When shooting outdoor weddings in natural light you can use a low ISO such as 100 or 200. This will minimize noise in your wedding photos, and help to maintain the sharpness and detail of your images. It will also help to maximize the dynamic range of your image. It’s good to understand outdoor wedding photography if you shoot in places where it’s common to have an outdoor wedding ceremony.
Choosing Shutter Speed
When shooting wedding photographs outdoors, it’s important to use a fast shutter speed to avoid motion blur. A shutter speed of at least 1/250th of a second is recommended for capturing slow moving subjects. 1/500 to 1/1000 is even safer and unless it’s low light and your ISO is getting too high.
Determining Aperture
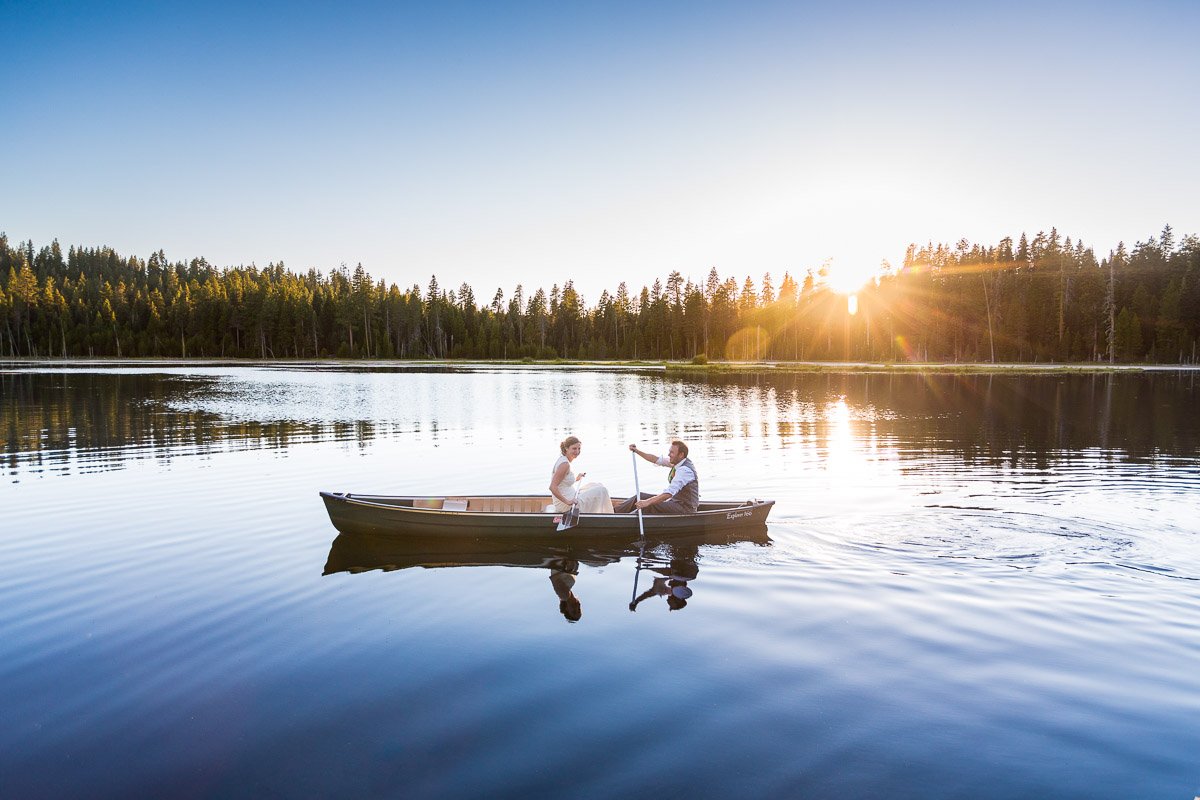
From there you can determine your aperture. Using a wide aperture, such as f/1.8 or f/2.8, can help to create a shallow depth of field, blurring the background and emphasizing the subject. This can be particularly effective when shooting portraits of both the bride and groom. There are other times you might want everything to be sharper and choose to use a higher aperture such as f8 or f/16.
Other Helpful Settings
You might need to use spot metering. The camera’s metering system may be easily fooled by the bright sky or the dark shadows. Spot metering can help you accurately expose your subject by measuring the light in a specific area. Lastly, try using a polarizing filter to help to reduce glare and reflections in outdoor scenes. It will make colors more vibrant and enhance the contrast in the image. Even if you don’t have any water in the image (a classic use case) try using a polarizer to cut the reflections coming off other objects. You will be surprised at how it can change the look of your images. Be aware that you will want to take off a polarizer indoors because it robs about 1 stop of light from your lens. Removing it will help keep your shutter speed up and ISO down in low light situations.
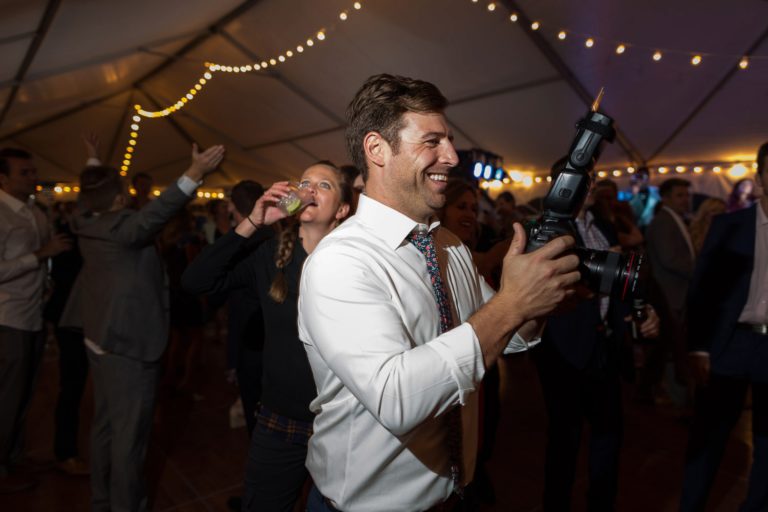
Best Camera Settings for Indoor Weddings
Best ISO For Wedding Photography
When it comes to indoor weddings, you may not have the option to use a low ISO such as 100 or 200 because you need to keep your shutter speed fast enough to avoid motion blur. Be mindful of noise that can occur when using high ISO settings. A good starting point is ISO 800 or 1600. This can vary depending on the lighting conditions of the wedding venue and the capabilities of your camera. If your ceremony is very dark, you might be ok with pushing your ISO up to 6400. The main consideration is how new your camera is. The latest generation of cameras looks pretty good at 6400. However, five years ago, I would not have been comfortable above ISO 3200. Make sure you test out your camera to find the limit of ISO you feel confident in. Another way to reduce digital color noise in post production is to convert to black and white. There will still be some grain but it’s less distracting without color.
Best Shutter Speed for Wedding Photography
When shooting indoor weddings, luckily you can sometimes use a slower shutter speed since the subjects are not likely to move as much. However, be aware of camera shake causing blurriness. A longer lens also will tend to exagerate camera shake more than a wide-angle lens. You may be able to shoot a lower shutter speed with your 35mm than with your 70-200mm. A good rule of thumb is: make your shutter speed double your focal length. For a 200mm focal length, shoot at least 1/400. For a 50mm lens you might be able to get away with 1/100 or less if you have steady hands.
Best Aperture for Weddings
Again, wide aperture, such as f/1.8 or f/2.8, can help to create a shallow depth of field. This will blurr the background and emphasize the subject. Additionally, the wider aperture you’re able to use the better you’ll be able to balance that with your shutter speed. Use evaluative or matrix metering to help to accurately measure the light in a scene with varying lighting conditions. An example is an indoor venue with bright windows and dark shadows.
Lastly, there may be times when you need to use a flash to help to add light to the scene and fill in shadows. This is especially crucial during the wedding reception when it’s getting darker. We also love using off-camera flash to highlight specific parts of a scene and hide everything else. This method can turn a busy (aka ugly) reception venue into a dark backdrop only showing the couple and whatever else is lit in the scene. This goes for best aperture for portrait photography too.
Wedding Photography Settings with Flash
The flash settings for wedding photography will depend on the specific lighting conditions of the venue and the desired effect you want to achieve in your photos. Ultimately, the right camera settings and preparation will help you capture the perfect shots on someone’s wedding day. So, grab your camera and get ready to create some stunning photos!
Here are some general tips for using flash in wedding photography.
Flash Settings
Flash power: The power of the flash will depend on the distance between the camera and the subject. Adjust the power of the flash accordingly to ensure that the subject is properly lit without overexposure or harsh shadows. It’s important to know that as the distance from your subject grows, you will need exponentially more flash power (look up the “inverse square law” for more details).
Flash mode: The flash can be set to manual mode or TTL (Through-The-Lens) mode. In manual mode, the flash output is set manually by the photographer. In TTL mode, the camera will automatically adjust the flash output based on the ambient light and the subject’s distance from the camera. TTL mode can be a good starting point but I usually recommend manual mode because it is more controllable and repeatable. It will also save your battery because the flash doesn’t have to do a pre-flash burst to calculate the proper exposure.
Flash synchronization (camera sync speed): The flash should be synchronized with the camera’s shutter speed to ensure that the flash fires at the correct time. In general, use a shutter speed of 1/200th of a second or slower when using flash. You can use High-Speed Sync which allows faster shutter speeds but you will lose flash output power. If you need the full output of the flash, stay below your camera/flash sync speed.
Flash diffuser: Using a diffuser on the flash can help to soften the light and reduce harsh shadows. A softbox or umbrella can also be used to create softer, more even lighting. We typically don’t use diffusers unless we’re shooting very specific scenes but they can be nice.
Flash angle: The angle of the flash can affect the lighting and shadows in the image. Experiment with different angles to find the most flattering and natural-looking lighting for your subjects. A good starting point is 45 degrees to the side and coming at a 45-degree angle down to create interesting light/shadows. We tend to prioritize the bride’s face for nicer light so coming from behind the groom is often the better choice.
Flash location: With off-camera flash techniques you might place the flash in a particular location depending on your goals. It might come down to the flash angle you want to create. Sometimes you might move it around like during your wedding couples portraits but other times you might need it to stay put such as during the wedding reception. Get a good solid light stand and test out various scenarios to find what works for you.
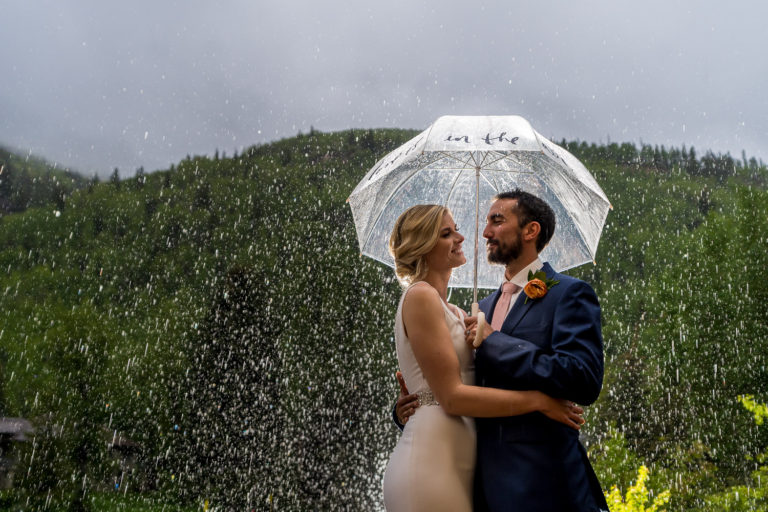
How I Choose Camera Gear for Wedding Photography
As you can see, wedding photographers have to be able to shoot at a variety of wedding venues in a variety of situations. That makes having the right settings and wedding photography equipment really important. You don’t want a little rain to slow you down.
How Dynamic Range is Important in Wedding Photography
It’s important to me to have a camera with a big dynamic range because that allows me to deal with challenging lighting situations and still have great exposure in my images from the darkest shadows to the brightest highlights. Even in the highest contrast scenes, you’ll be able to capture highlight and shadow detail if your camera has enough dynamic range.
Why Mirrorless Cameras are Good for Wedding Photography
Shooting with Sony mirrorless cameras has simplified my life because you can see in the camera’s electronic viewfinder (EVF) what your images are going to look like before pressing the shutter. I rarely have to worry about camera metering or exposure compensation because I shoot in manual. Essentially, what you see is what you get. One caveat is to not be fooled by shooting with a slow electronic shutter. You might end up with a shutter speed of 1/4 because you quickly rotated a dial and you aren’t listening the the click/clack of the shutter. This will result in lots of blurry photos 😉
Why Wedding Photographers Love Low Aperture Lenses
Having low-aperture lenses is crucial for being able to shoot in low-light conditions. It can be hard to balance quality and price but I always recommend getting the fastest lens you can afford as long as it’s not too heavy to actually bring with you. Maybe skip the f/1.2 lenses!
Next check out our 9 Best Tips for Outdoor Wedding Photographers.
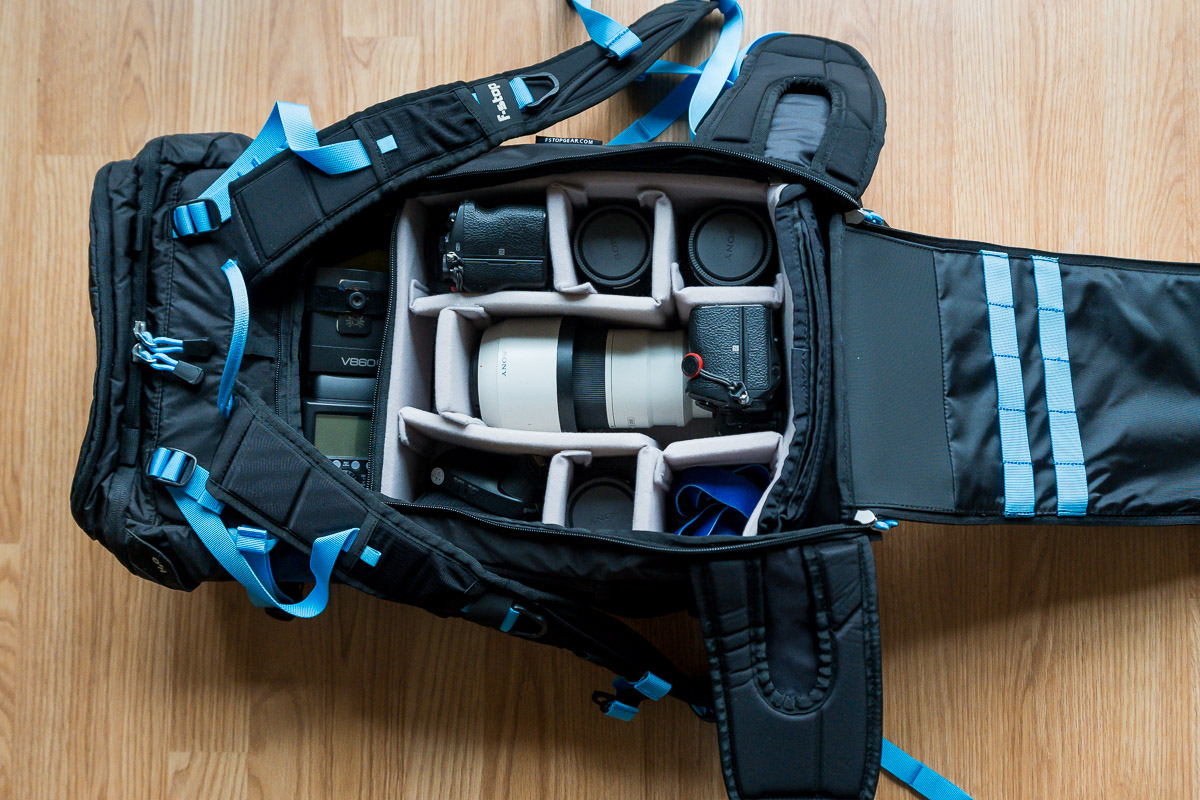
Cameras, Gear, and Lenses I Recommend
Below is a list of some gear I recommend that will help make photographing weddings easier. I choose my favorite cameras based on the above features such as high ISO capabilities, fast focus mode, and dynamic range. My favorite lenses are low-aperture lenses that are lightweight and affordable as well as my top choices for accessories.
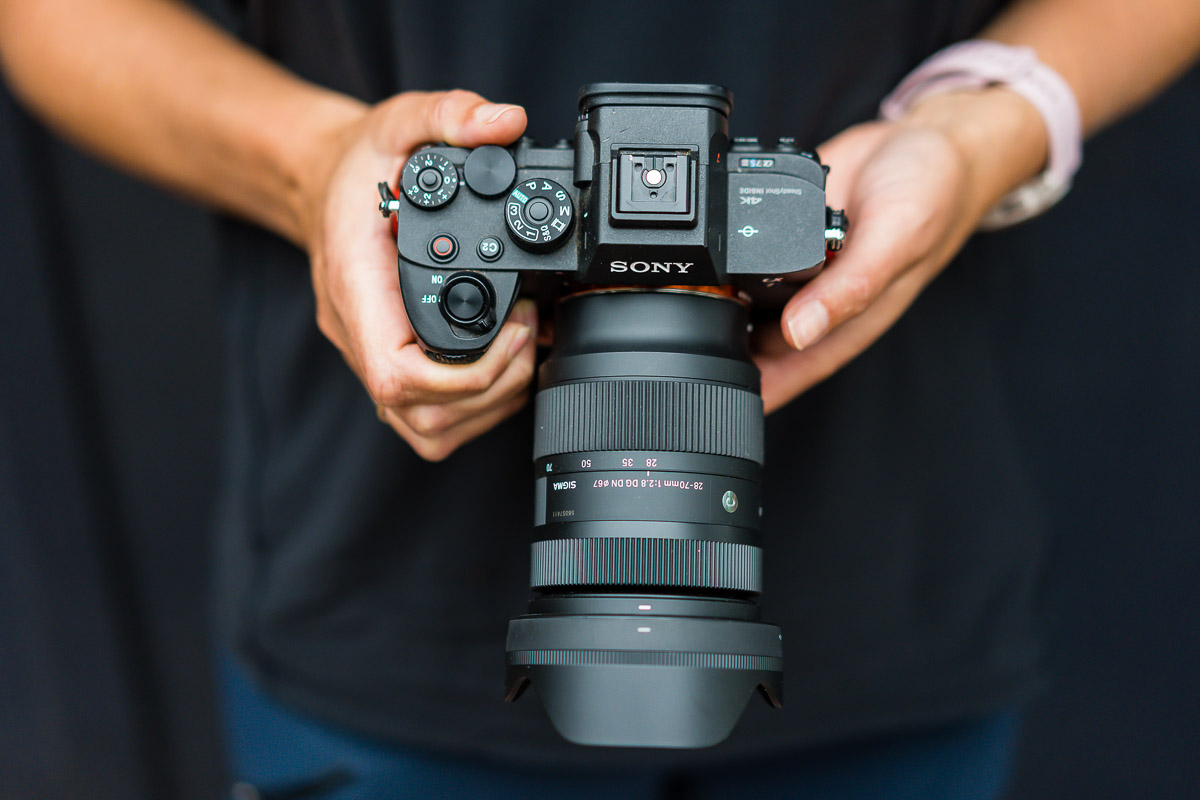
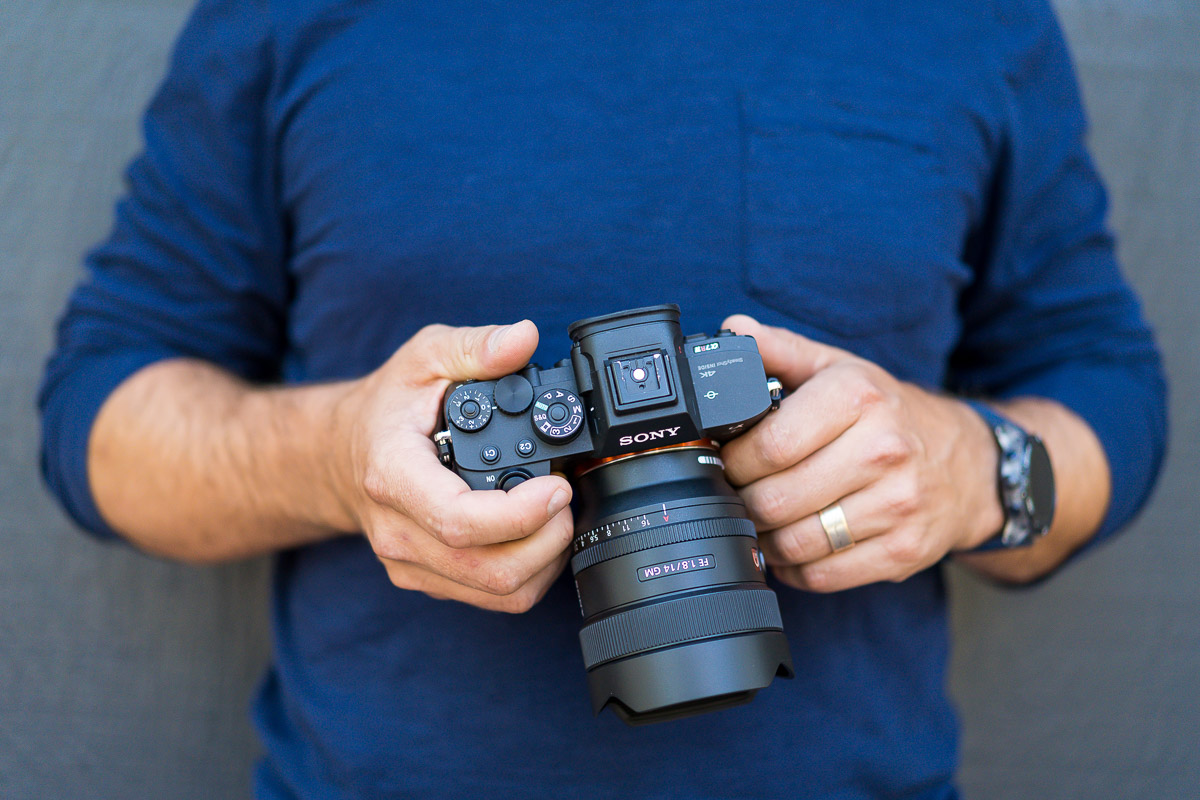
Camera Body: Sony A7IV
Lenses:
Flash System
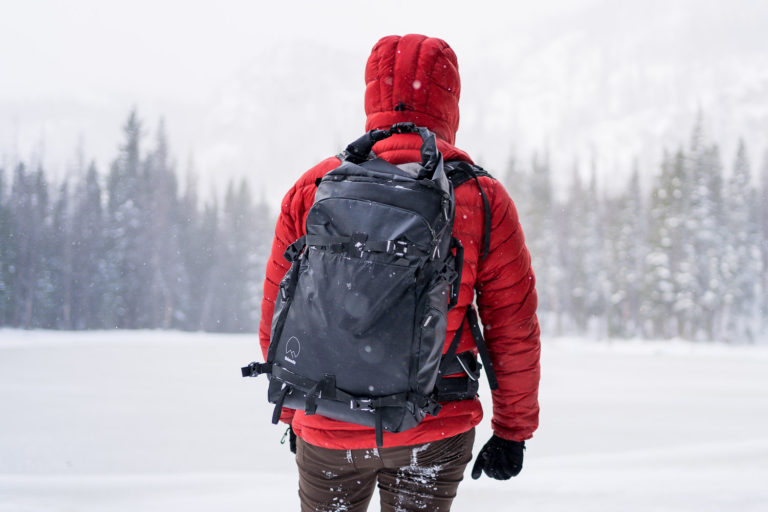
Backpack: Shimoda Action X30
I hope you found this post helpful! You might find this travel photography gear list helpful or these marketing tips. If there is anything you’re struggling with leave a comment below and we will do our best to help whether it is a specific camera setting or what camera to buy!
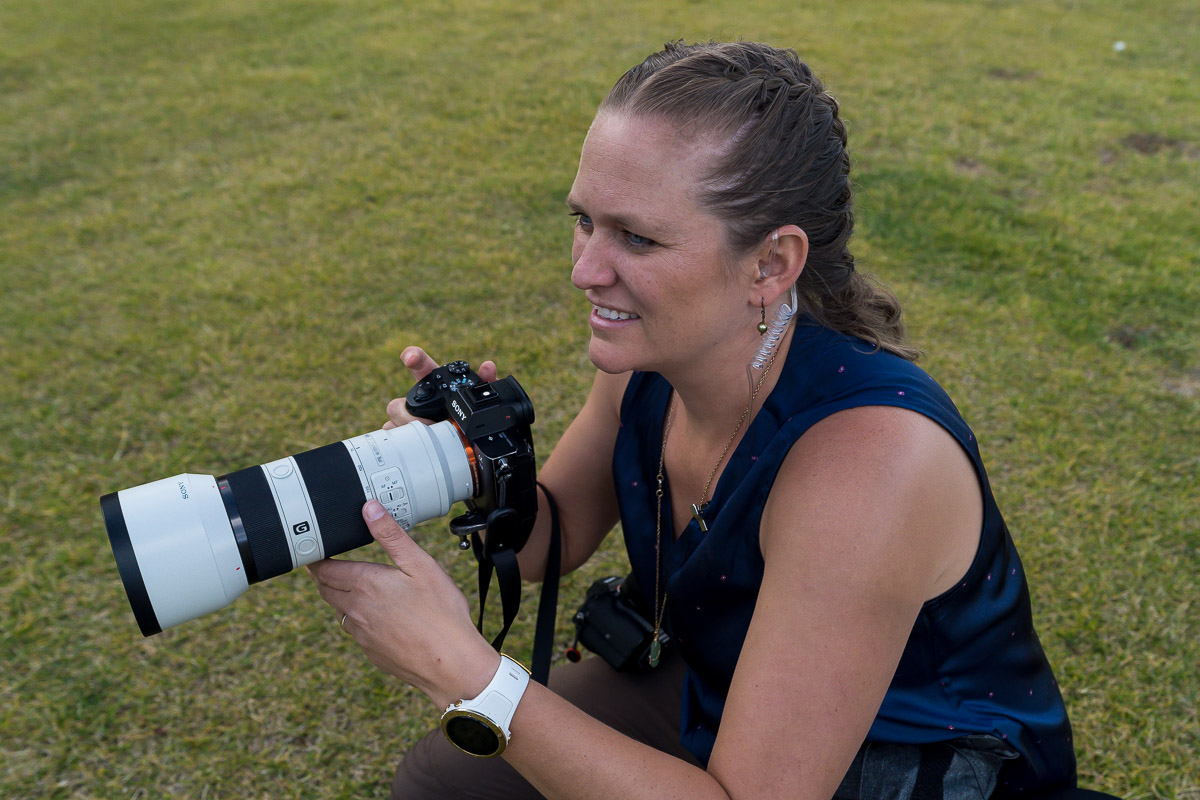
About the author
I am Marc Bergreen, one half of a Evergreen husband and wife photography team specializing in Colorado wedding photography and videography and adventure photography. If you need wedding photography tips or advice on the best gear for your goals, reach out.
Download our free guide on how to build a creative business and a life you love. Don’t hesitate to contact us and let us know how we can help! Links to products are affiliate links.
In the meantime, remember to…