Our 9 Best Outdoor Wedding Photography Tips (Including Night and Lighting)
Today we’re sharing our 9 best outdoor wedding photography tips for day or night. (Plus two bonus tips on wedding photography at night and lighting for outdoor photos.) Whether you’re planning an outdoor wedding or photographing one, it’s important to be one with the elements.
The outdoor wedding photography ideas below are a comprehensive guide to get you started taking better outdoor wedding photos. You might also enjoy this minimalist wedding photography gear list, it’s how we stay light and mobile at outdoor weddings.
We’ve been professional photographers for over a decade and are sharing that experience. If you’re new check out our steps to starting a wedding photography business and wedding photography tips for beginners. Or for a next level challenge, camera settings guide or photographing weddings in the rain.
outdoor wedding photography tips outline
Below is a list of the outdoor wedding photography topics we’re going to cover. Outdoor weddings can become your favorite thing to shoot if you’re ready to control the controllable and prepare for the rest.
- battling the mid-day sun (seek shade)
- simple (but effective) timeline adjustments for better outdoor wedding photos
- control the direction of the sun
- depth of field
- knock down powerlines and other distractions
- dress for the elements
- foreground (include some)
- exposing for the highlights
- dynamic range
- lighting tips for outdoor weddings
- outdoor night photography
tips for the outdoor wedding photographer
Most of our outdoor wedding photography ideas included in the guide below are for the outdoor wedding photographer. Initially, this post started with a few tips for shooting stunning outdoor wedding photos but after a few updates, it’s evolved into a comprehensive guide.
At the end of a few sections, we also mention wedding planning tips for brides gleaned from the topic. You can always skip to the bottom for a concise list of tips for brides and if that’s you don’t miss our blog section Wedding photography tips for brides.
For you photographers, we’d love to hear which of these tips you find helpful in improving your outdoor wedding photography! We have also created a video series for those of you that prefer to learn that way. Below is our outdoor wedding photography series, scroll down for the text.
outdoor wedding photography video series
The following videos put most of this blog content into a series that you can watch or scroll past for the blog post!
our 9 best outdoor wedding photography tips
1. battling the mid-day sun (seek shade)
One of the biggest challenges of photographing an outdoor wedding is the lack of control over the light. Sure you can influence the timeline (see next section) or you can add artificial light which we’ll talk about later. But odds are, you’re going to have to shoot something in the middle of the day.
Unless you want images of people squinting or dark circles under their eyes from the sun shining down on the top of their heads, you’re going to have to make an effort to overcome this challenge.
My first instinct with outoor photos is to find some shade. This can be a big oak tree, the edge of a dense forest, or the side of a building. Shade gives you soft light but is often quite restrictive on which direction and where you can shoot.
You also have to consider that when you expose for people in shade, sunny backdrops will get blown out. Make sure your exposure is accurate and you’re not trying to put bright and dark elements in the same frame. You might get away with this at sunset but in the middle of the day, it will likely stretch what the camera can record.
Bottom line, if it works, go for the shade. This is usually the simplest and quickest solution.
other angles
Secondly, I would suggest angling your outdoor wedding clients so that the sun is behind them (more on this below). The third option is to overpower the sun. You can darken your ambient exposure to knock down the highlights. Then add in off-camera flash to fill in the subjects. This can create nice light on the bride and groom but is often slow and cumbersome.
It takes time to get the light positioned correctly and the exposure balanced. If you’re not in a rush, this can be a great way to go and we’ll discuss it more in a later section. However, it does require that you have several flashes with you. (Overpowering the sun is almost impossible if you only have one speedlight). We love using the Godox AD200 as a more powerful lighting option!
The last strategy I employ is to angle my clients so the sun shines directly on them (or slightly off angle) and expose for the highlights (see more on this below). It can create a dramatic look. And it works well if you want to show a lot of the backdrop. That is often the case for outdoor wedding photos!
This technique works well if you have clients that are not as sensitive to bright sunlight. Finally, it is important to consider is how many people you’re trying to put in the photo. For large group portraits, shade is often the best strategy.
Lesson for outdoor wedding photos: we can’t control the sun and we can’t control the weather, check out this next post on wedding photography in the rain.
For Brides: Consider if your venue has any shade. It’s not only important for your photos but also for guests if it turns out to be a hot day.

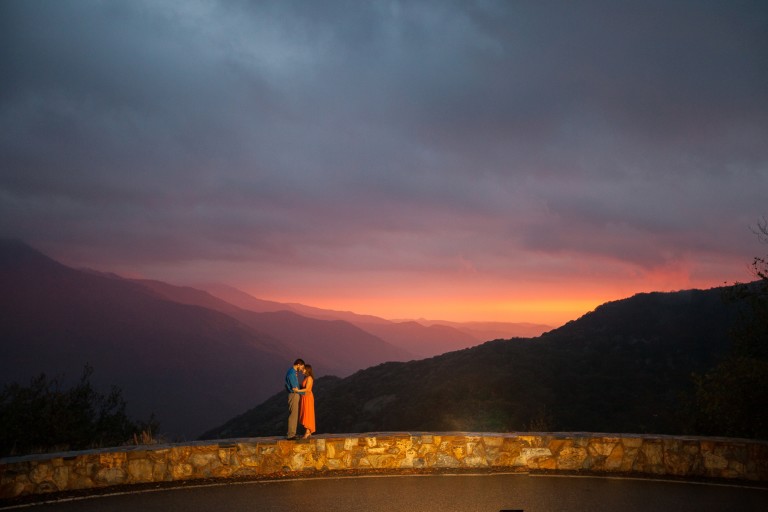
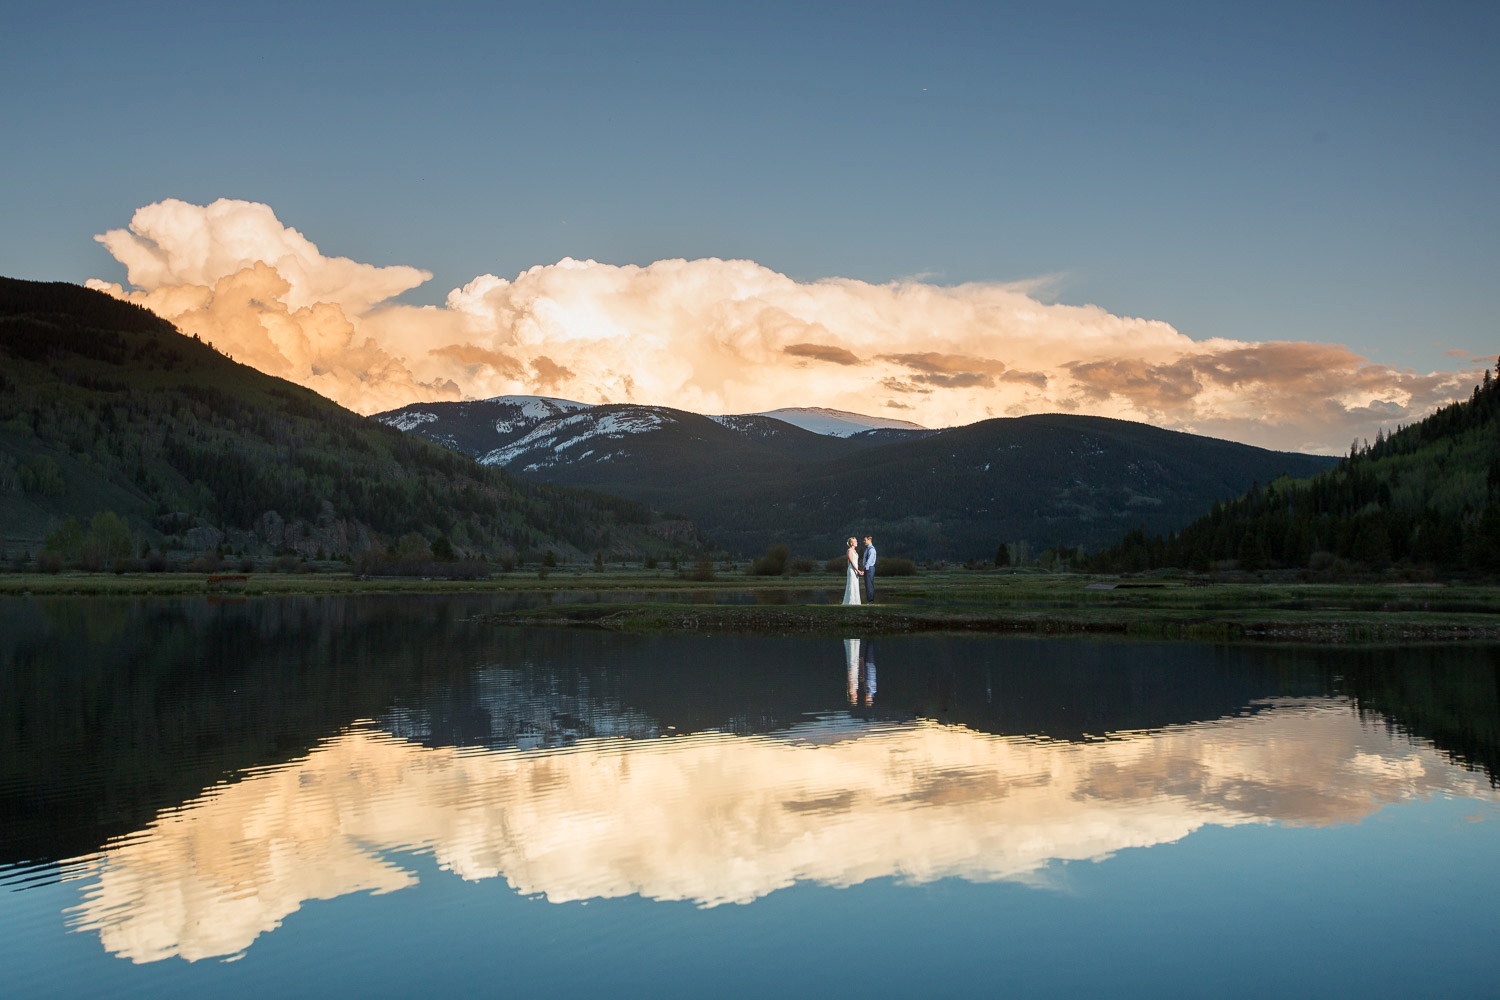
2. simple (but effective) timeline adjustments for better outdoor wedding photos
As photographers, setting the timeline can be incredibly helpful in getting the best photos. If your couple schedules portraits at noon and the sun is directly overhead, it is going to be much harder than if you have a sunset portrait session (see above section).
We discuss lighting and shooting when the light is best several times with our clients. It even regularly comes up in the consult before they hire us. Our goal is usually to convince our clients the importance of having some time (even just a few minutes) around sunset to go out and enjoy the beautiful light.
In addition to portraits at sunset, if we can encourage our clients to schedule their ceremony later in the day, it usually makes for better photos. We have found that the best scenario is a late afternoon ceremony. This allows plenty of light for ceremony and family photos, but it also puts the couple portrait session close to sunset, a win/win scenario!
For Brides: Consider the location of the sun when planning your timeline. It’s not only for the photos but it also impacts the comfort of your guests.
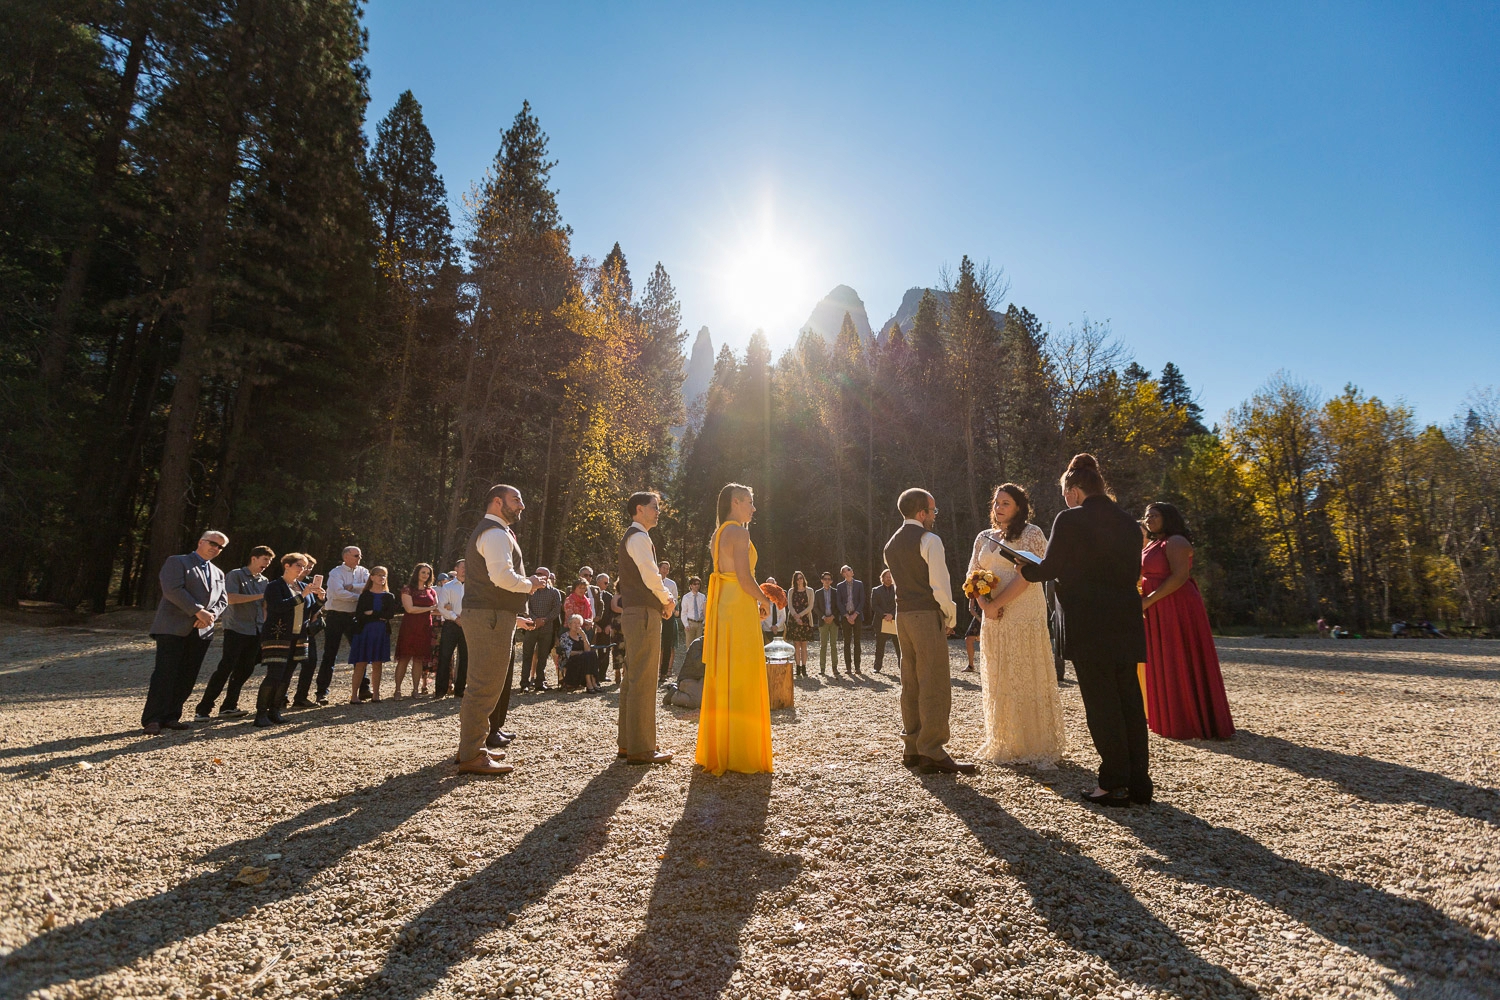
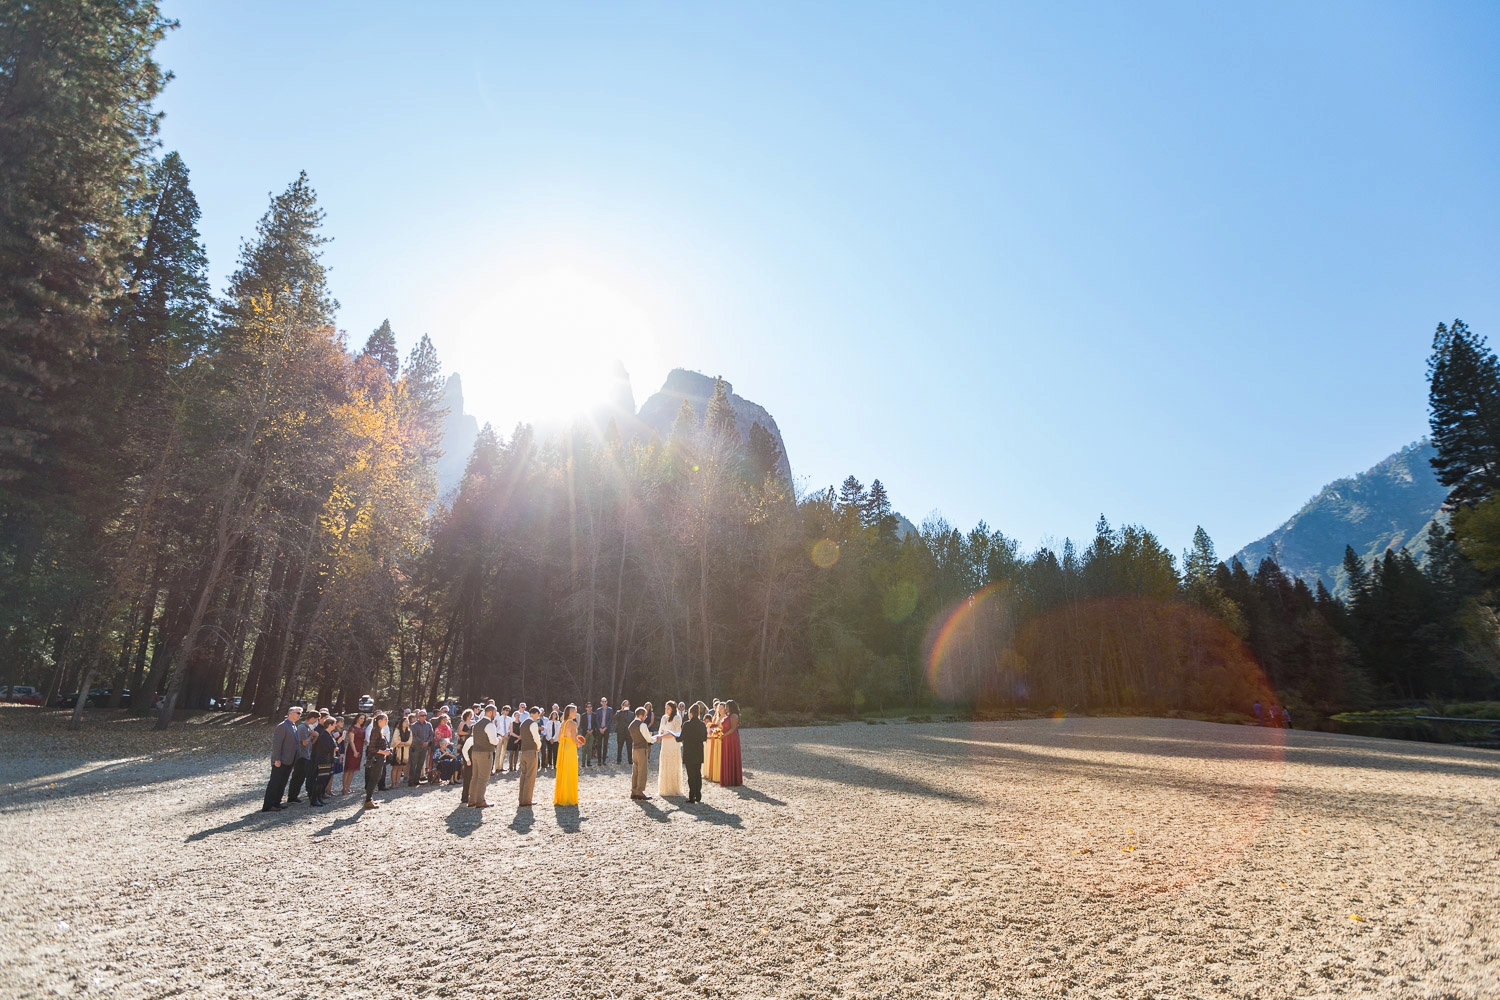
3. control the direction of the sun
Obviously we can’t tell the sun where to go but we can move ourselves! For our more adventurous elopement couples, this usually means we can help them decide where the ceremony should be and what direction they should face.
For our couples getting married at a venue that has an established ceremony site, this often means choosing which side of the ceremony to shoot from. Typically, I will opt to shoot from the side with more direct sunlight. This allows me to expose for peoples faces and get a good exposure of the backdrop as well.
If I were to shoot from the other side (more backlit side), I would have difficulty getting properly exposed skin tones in addition to a properly exposed backdrop. The result is getting blown out highlights which are never a good idea unless it is part of the photo (usually in the background) that completely doesn’t matter like a window.
Another helpful thing to do when scouting is use an app like Photographers Emphemeris or Photo Pills to see what the sun angle will be and prepare yourself to shoot accordingly. This might also tie in with the above section: if you can influence the timeline, you can control what the sunlight will look light during the ceremony.
For Brides: When possible, consider the direction of the light from your ceremony location. Again, it’s not only for the photos but it also impacts the comfort of your guests.
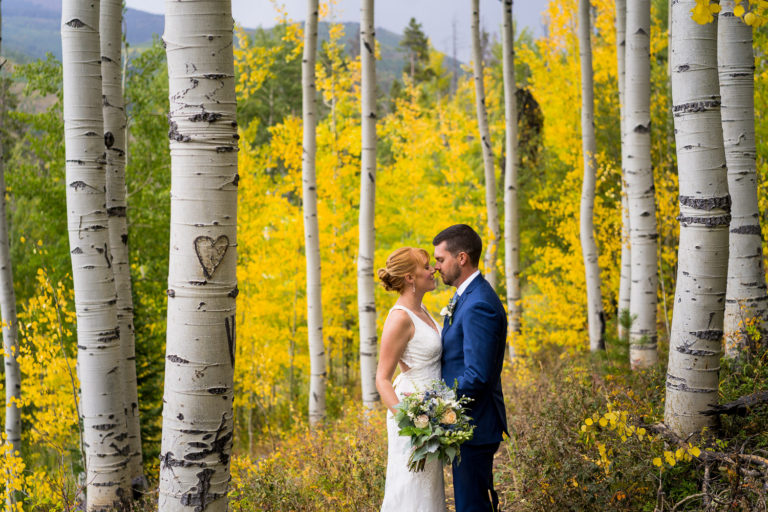
4. depth of field
When it comes to outdoor wedding photography, it is important to recognize that people choose to get married outside for a reason. Often, the setting is very important to the couples we photograph and what they are looking for in their outdoor wedding photos.
This means that in order to tell their story, we need to include the background in their photos. This translates to shooting at a higher aperture, especially when shooting longer lenses.
Additionally, we often like to use wide angle lenses (we use this one from Sony) because they offer more depth of field than telephoto lenses, especially at lower apertures. Sometimes it is a creative decision to blur the backdrop but realize that it is often important to the couple to include it in their photos.
For Brides: Ask to see some examples of outdoor weddings from your photographer, or stalk their blog, to see if they capture the setting how you want to remember it.
5. knock down powerlines and other distractions impending the beauty of the outdoor wedding
I wish all power transmission lines could be installed underground and we could completely eliminate overhead power lines. They are often obtrusive and turn what would be a beautiful clean backdrop and turn it into a cluttered distracting maze of little black lines.
Ideally, you can position yourself to eliminate them altogether, but in come locations that is just not possible. By getting low to the ground, power lines can be minimized.
In addition, they become much less visible if you can shoot at a lower aperture. That may go contrary to the above section but hopefully if the backdrop is a scenic view, nothing distracting has been installed that would be obtrusive.
Generally, if you work hard to find clean backdrops for your photos, you can eliminate or minimize distractions.
For Brides: You might not even notice things like powerlines when you look out at the view but your photographer is trained to notice things like that. Don’t hesitate to lean on them/us.
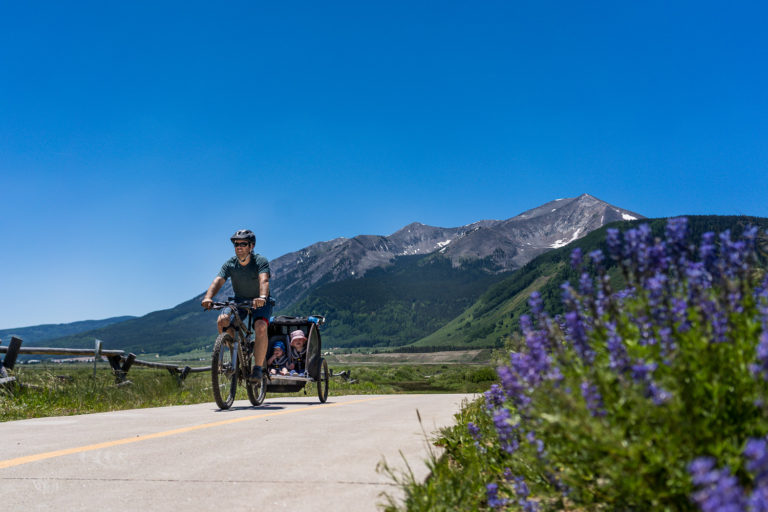
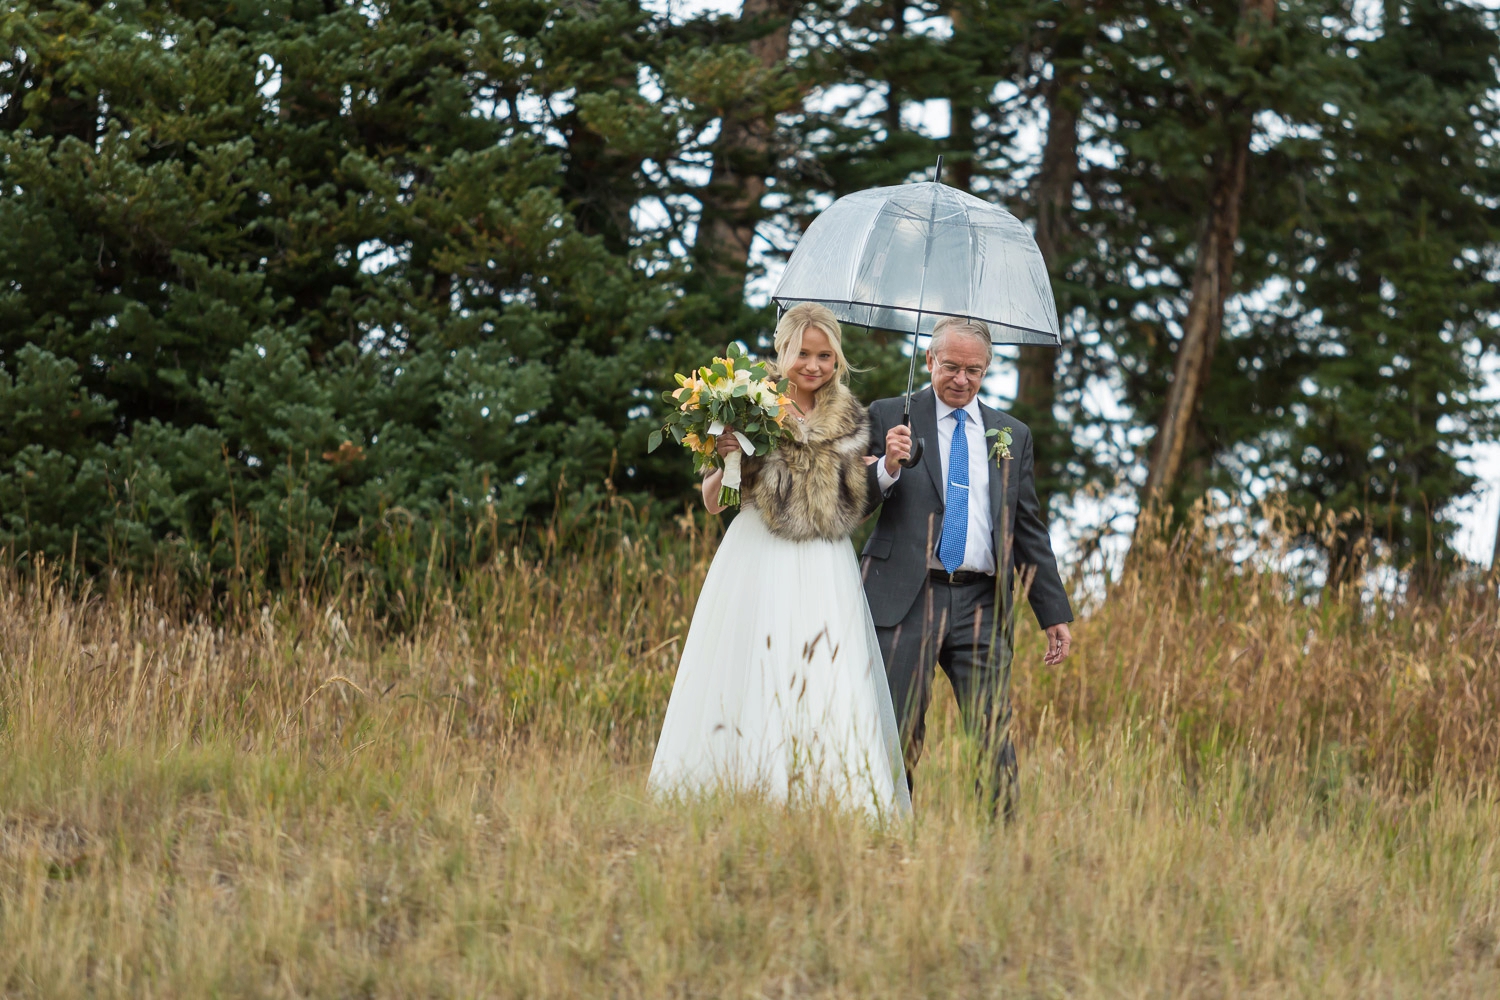
6. dress for the elements (the outdoor wedding photographer comes prepared)
Being Colorado mountain wedding photographers, we often encounter all the elements of a wedding day. We have found it incredibly important to remain comfortable so that we can focus our energy on creativity.
This means coming prepared and dressing for the weather. We try to be as warm, dry, and comfortable as possible so that we can give our clients all of our attention. This means we almost always have a puffy jacket, hat, gloves, rain jacket, umbrella, and extra layers in our bag.
In addition, we often carry extra layers so we can lend an extra jacket or gloves to our clients when the weather turns cold!
For Brides: Plan ahead for the elements, if you’re getting married outside it might get cold so . Sometimes our brides even bring hiking shoes for portraits.
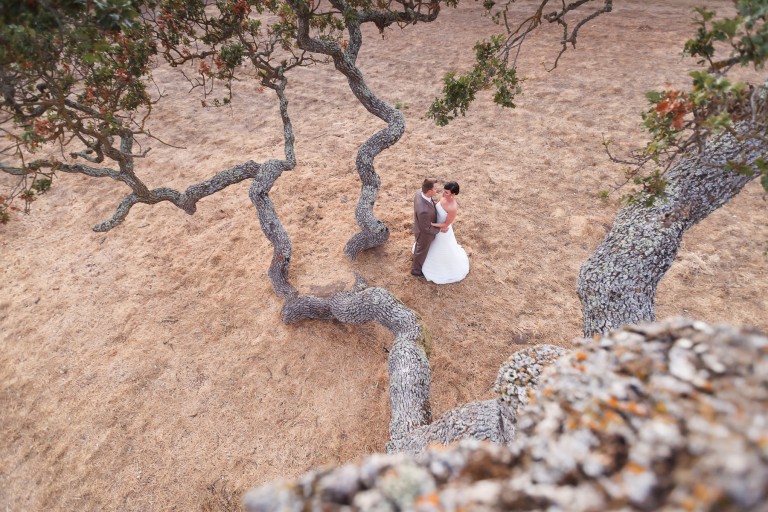
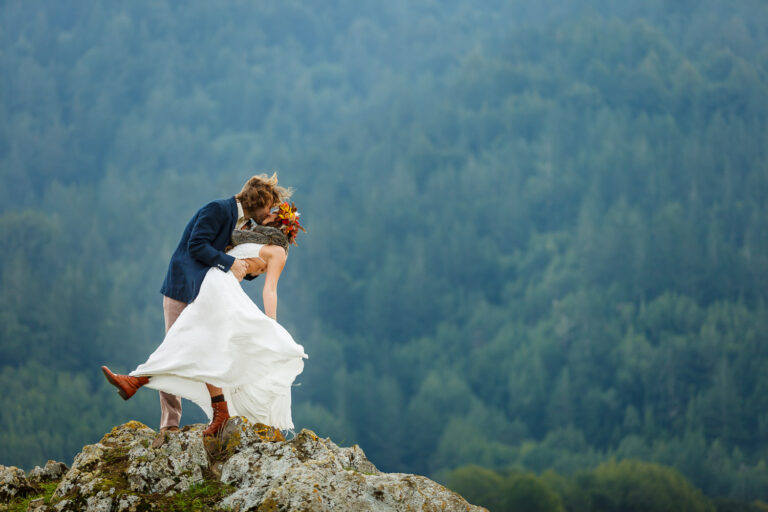
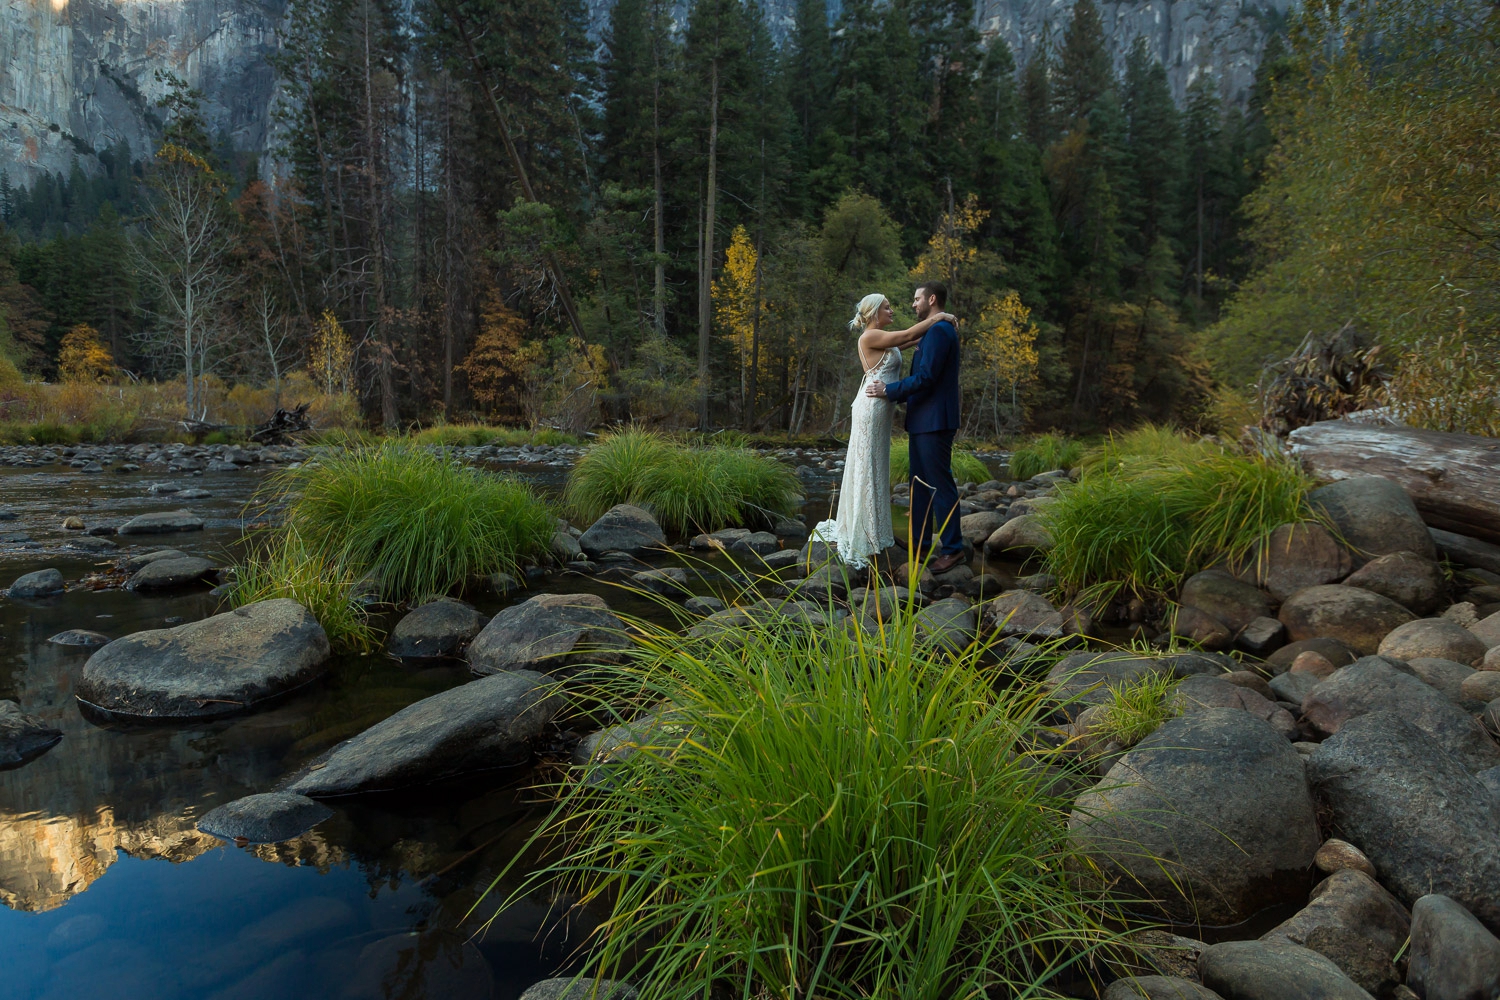
7. foreground
When composing a photograph, the foreground is often overlooked. Foreground adds context and can lead the viewers eye toward the subject. Another version of foreground is layering.
By adding layers to a photograph, you can tell better stories and create a more dramatic feel. Layers can be anything, people, graphic elements, or contextual subjects.
When you are within a few feet of the layering item, it can help frame the subject while providing the viewer a sense of the scene. They can be difficult to employ but when used well, layers are very powerful in making great photographs.
For Brides: These next 3 tips are just going to come down to picking the right photographer, leaning on them for advice, and trusting them to capture your day.
8. exposing for the highlights
Exposing for the highlights is something I intuitively knew but had never been explicitly told until recently. Essentially, it means making sure that there are not areas in your photo that are unintentionally overexposed.
Once overexposed, an area of a photograph cannot be recovered. With todays cameras and editing software, even very dark areas of photographs can be recovered but blown out highlights are difficult to recover.
It is best to make sure that your photo is exposed for the brightest portion, especially if your subject is the brightest part of the scene. Letting the rest of the photo be dark is a great way to focus attention on a bright subject.
The exception to this rule is if something is extremely bright compared to the subject (i.e. the backlight of the sun or window light). Letting these fade to white is fine as long as you are aware of your exposure.
The main thing to consider when intentionally overexposing is that your eye is drawn to the brightest part of the photograph. If this bright area competes with your subject, it will be distracting to the viewer.
9. dynamic range
Dynamic range is often a challenge when photographing outdoor weddings. You might think it is just a fixed quality based on the camera but there are some tools we often use to assist. When you’re battling harsh light, lots of dynamic range is your friend.
In addition to having a high quality camera (our current favorite is the Sony A7III), a graduated neutral density filter (our current favorite is this one) can be your friend. It is a little cumbersome to use quickly but it can make a big difference when balancing the wide range of exposure between sun and shade.
Another tool that we have found especially helpful is a polarizing filter (we really like these). It isn’t designed to help with dynamic range but it does do a great job cutting reflection. This in turn helps make the exposure more even and helps balance the highlights and shadows.
We have found that you get what you pay for when it comes to polarizers!
Then, once you have considered the dynamic range for the background it’s time to consider how to make your couple stand out. Sometimes it’s finding a patch of light or creating one and sometimes it has to do with where you position them in the frame.
bonus tip 1: outdoor wedding photography lighting tips
When it comes to lighting tips for your outdoor wedding photo, see items 1-3. The honest truth is that on a wedding day you don’t have a lot of time to set up complicated lighting for every shot. Our outdoor wedding photography lighting tips begin and end with keeping things simple.
First, you should have a plan to battle the mid-day sun by controlling the timeline to shoot in better light and thinking about the direction of the sun. Then you can choose when you want to use more complicated lighting techniques. You can use artificial light out of creativity rather than desperation.
You can overpower the mid-day sun with off camera flash but it will never have the same look as shooting at sunset (our preference).
As outdoor photographers we have always strived to make a photo look real. You may have your own style but we like to avoid heavy presets or altering a landscape too much from how it really looks. Therefore, when we’re adding artificial light, our first choice is to try to make it look as natural as possible.
What is your purpose or philosophy for your outdoor wedding photo?
What’s the aim of your outdoor wedding photo? Is your purpose to add drama, stretch your creativity, or highlight the subject?
Our favorite way to light an outdoor photo is to try to add light that looks like the sun could have been the source. Obviously this isn’t practical for things like night photos discussed above. The main take-away is to have a purpose for what you’re doing with your light.
Planning ahead and having a few “go to” lighting ideas is a great way to improve the look of your images. Again, if you’re going to be competing with the actual sun you will need a powerful light source such as the Godox AD200.
Maybe you’re just trying to get the couple to stand out from the background more. This is probably one of our most common goals. Sometimes we’re trying to enhance another light source like a fire.
Another popular reason to light something is to direct the eye to the brightest subject like a couple during their first dance. Start with a goal, such as light subject on a dark background. You’ll have much better luck creating the look you want.

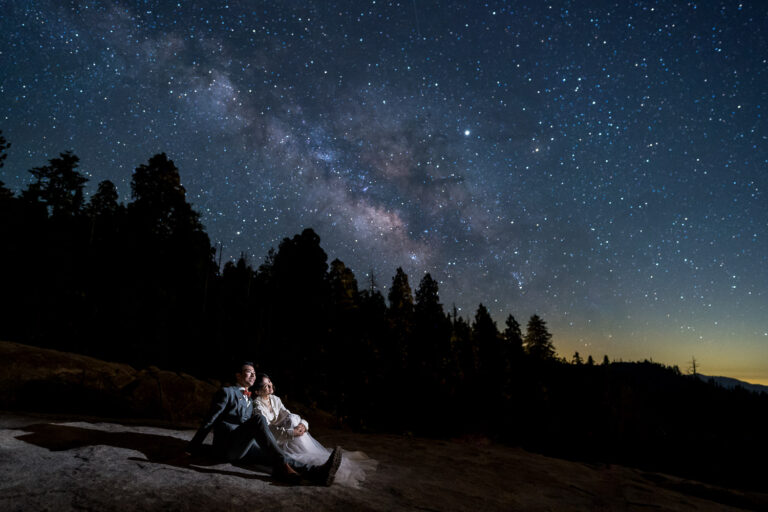
bonus tip 2: outdoor night wedding photography tips
As often as possible, we like to end the day with some outdoor night wedding photography. There is a lot to be said on this subject so I will try to give you some of our best tips.
Planning ahead is key. Guess what?! When it’s dark outside it can be hard to see, so if you can plan your framing ahead of time your night photos will go a lot more smoothly.
shooting wedding photography at night
The main challenge for the outdoor wedding photographer come from shooting wedding photography at night. The camera needs light and when there isn’t much we need to find it or create it.
This is where it helps if you have two photographers. Getting a good night photo can take a little patience so having someone covering the dance floor while you set up a shot can be helpful. Additionally, having your teammate stand in for a photo can help you see what the shot is going to look like before you take your couple away from the party to stand outside when it’s cold.
Before you head outside to set up your shot don’t forget your jacket, tripod, light source, light stand, headlamp, and something to mark where you want the couple to stand. I can’t tell you how many times I’ve been outside in the dark shivering as I’m trying to set up a shot. Of course we work in the Colorado mountains so your circumstances might be different!
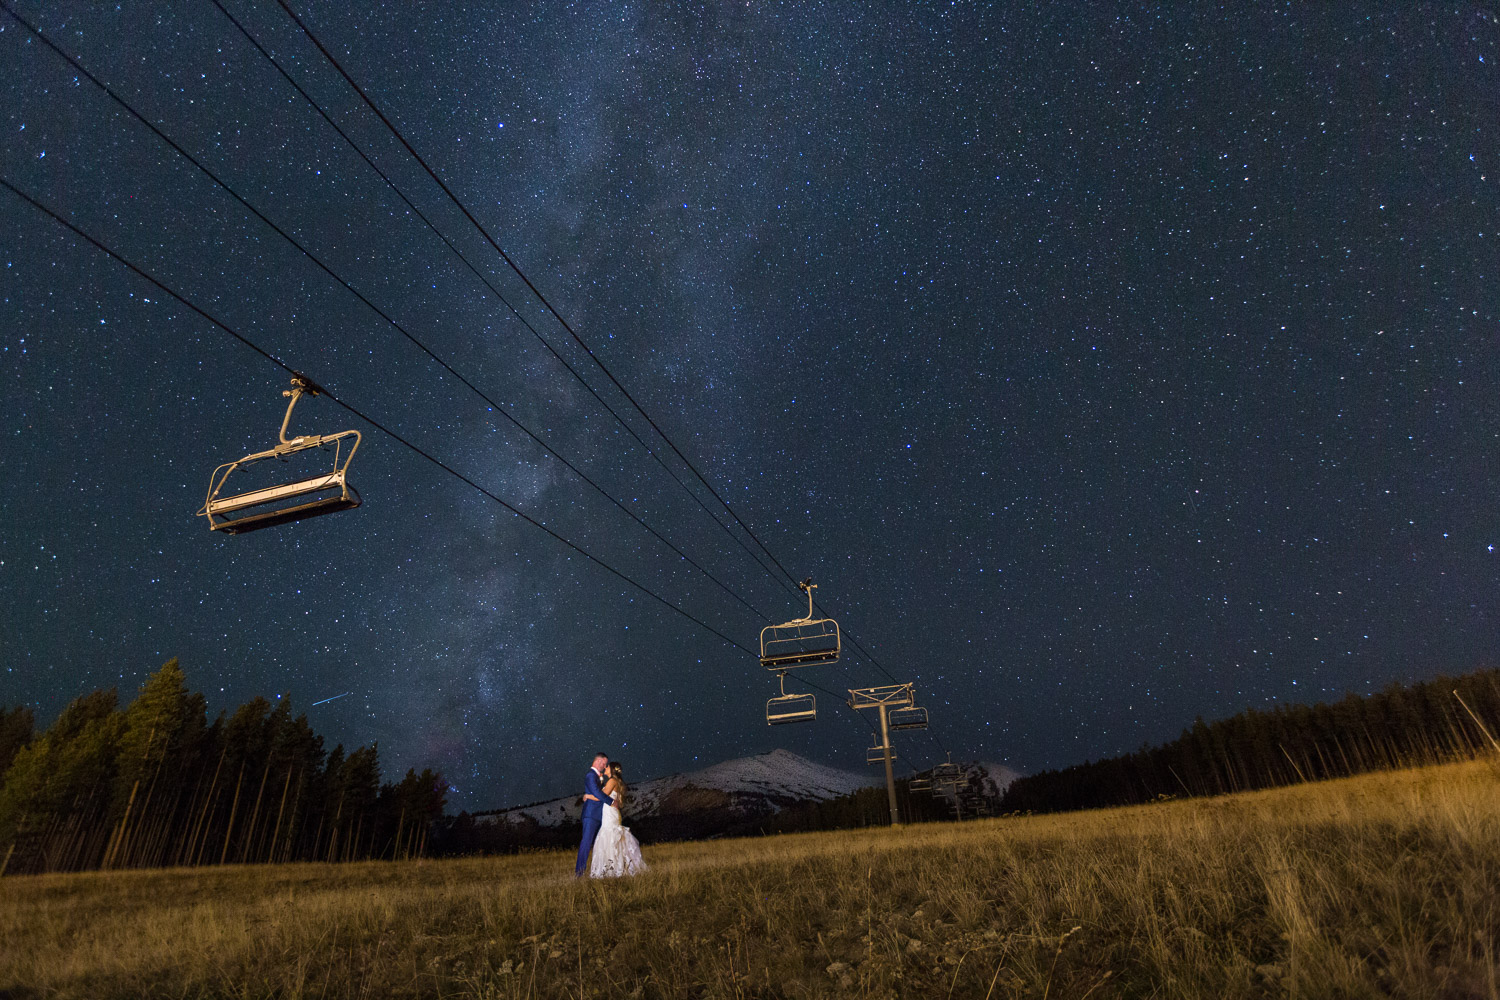
night wedding photography: practice, practice, practice.
Experiment, play, create. Brenda and I shoot night shots differently in the sense that I like to do quick math to figure out settings while she likes to follow her heart and instincts! It helps to have a starting point, a good baseline for exposure settings when shooting the stars is: 15 sec, f2.8, ISO 3200.
When you’re doing a few test shots to get your framing, I’ll usually go with 3 sec, f2.8, ISO 12800. This allows me to more quickly dial in my framing since looking through the viewfinder or at the back of the screen when it’s pitch black is sometimes not very effective.
Once I get the composition I like, I’ll work out where I want the couple to stand and set the focus on that point so I know everything will be sharp! (This is when having an assistant and a headlamp is helpful to nail the focus)
Either way, the more experience you get the more you’ll come to understand things like how ambient light affects your photo. Which is does, by the way, it really does. If you know you’re going to have a lot of ambient light, maybe plan for a blue hour photo instead of a star photo.
For Brides: Take the time for night photos, it’s fun to step outside at that point in the day and look up at the stars with the one you love!
summary of outdoor photography wedding tips
Thanks for stopping by to check out these outdoor wedding photography tips. We hope you learned something about lighting, night photos, or how to make your wedding photography better. Embrace and work with the environment!
tips for wedding photographers in review:
- Have a plan to battle the mid-day sun.
- Control the timeline, control the light.
- Think about the direction of the light when shooting.
- Know how much Depth of Field you want.
- Knock out the distracting elements.
- Be prepared for inclement weather.
- Plan your foreground and think about layering.
- Expose for the highlights.
- Overcome dynamic range challenges.
- Outdoor night wedding photography tips: plan, practice, and pay attention to ambient light.
- Outdoor wedding photography lighting tips: 1. Use artificial light out of creativity rather than desperation. 2. Start with a goal in mind.
tips for brides in review:
- Look for shade at the venue, especially if the weather could be hot.
- Consider the lighting when planning your timeline.
- When possible, consider the direction of the sun when planning your ceremony location. Aim to have either your whole ceremony in the sun or all in the shade. This will make your photos more consistent.
- Ask to see some examples of outdoor weddings from your photographer, or stalk their blog. See if they capture the setting how you want to remember it.
- Be prepared for inclement weather with warm clothes, umbrellas, maybe even a change of shoes.
- Pick the right photographer, lean on them, and trust them to use their experience to capture your day.
- Take the time for portraits. It’s fun to step outside at night and look up at the stars with the one you love!
come back soon!
Hope you enjoyed these tips, ideas, and outdoor wedding photos. Want more information like this? When you join our newsletter you will get monthly tips, deals, and updates.
AND you’ll have access to exclusive content such as our FREE e-guide for brides: Prioritize your planning so your wedding is a memorable adventure.
Or the one we made for photographers and entrepreneurs:Build Your Life: Stop following other people dreams, build a life and creative business you love.
If there’s a question we can answer, reach out. Most of our content is built from questions from our readers.
more tips for wedding photographers
top recent posts:
- Outdoor Wedding Planning Advice
- Sample Wedding Photography Timeline
- 3 Tips for Planning a Remote Wedding in a Wilderness Location
- Adventure Wedding Readings and Quotes
- Wedding Photography Tips for beginners
- 7 Best Couples Poses
There are a lot of resources out there with in depth information describing the complexities of wedding photography or elopement planning. For example this article on becoming a wedding photographer describes the different styles of photography you need to be able to shoot.
We are Marc and Brenda Bergreen, a husband and wife team of professional photographers specializing in outdoor weddings and other adventures. Capturing people in nature and the mountain lifestyle is a passion that became a dream that became a life.
Based in Evergreen, CO we travel throughout the state as Colorado mountain wedding photographers. We also frequently travel to California and other wedding destinations to document love and adventure in a variety of settings. Don’t hesitate to contact us and let us know how we can help! Be sure to follow us (weddings instagram & adventures instagram) and/or like us (facebook) to stay tuned.
In the meantime, remember to…